Smart Site Protection™:
Auxiliary Cameras in Smart Site Protection (SSP)
As an EnVR Administrator, your role in managing Auxiliary Cameras is vital to reducing unverified alarms and ensuring site security. While primary cameras trigger the AI detection, Auxiliary Cameras provide the necessary visual context to confirm a threat or identify an authorized visitor (like a delivery driver or janitorial staff).
Why Auxiliary Cameras Matter
-
Contextual Evidence: They allow verification agents to see a multi-up clip when initial evidence is inconclusive (e.g. including a parking lot or a side alley) to determine if a person detected inside is a threat or part of a legitimate delivery, based on their arrival vehicle.
-
Reducing “Unverifiable” Alarms: If a primary view is ambiguous, an auxiliary view acts as the “second look.” Without a properly tagged auxiliary camera, an incident may be marked as Unverifiable, leading to unnecessary escalations or missed security insights.
Setting Up Auxiliary Camera Views
As a user with EnVR Administration capabilities, follow these steps within the Device Management tools under Site Settings, to provision a camera for auxiliary use.
Pro-Tip: We recommend choosing an outdoor camera that provides a clear view of the area where delivery trucks typically park.
- Navigate to your Site: Log in to the Envysion application, click on the Sites tab, and select your site from the list. You can use the search box in the top right corner to find it quickly.

2. Access Site Settings: Once the site is selected, click on the Site Settings button.
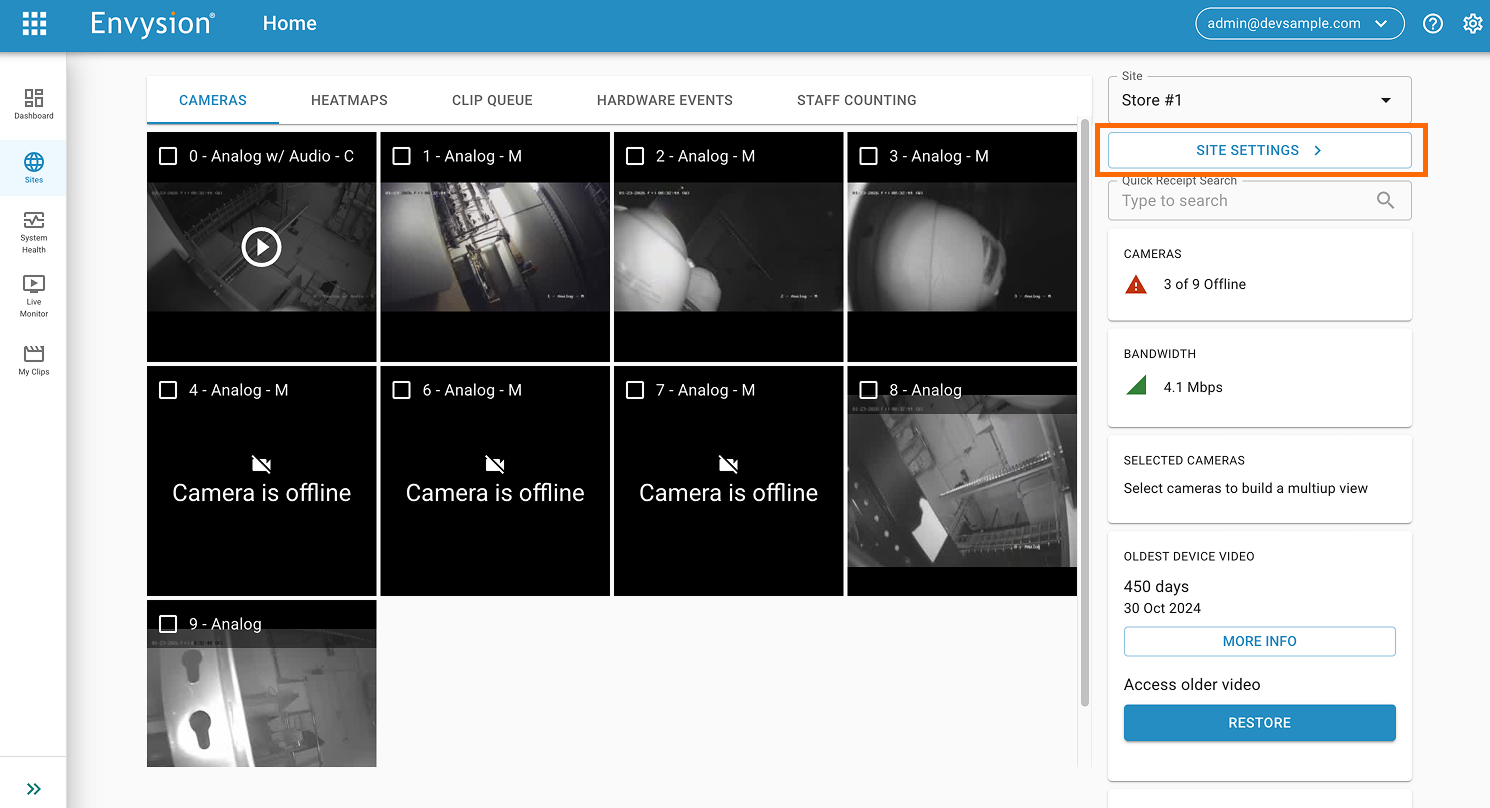
3. Select your Camera: In the Cameras tab, find the camera you wish to use for context. Click the Settings button next to that camera.

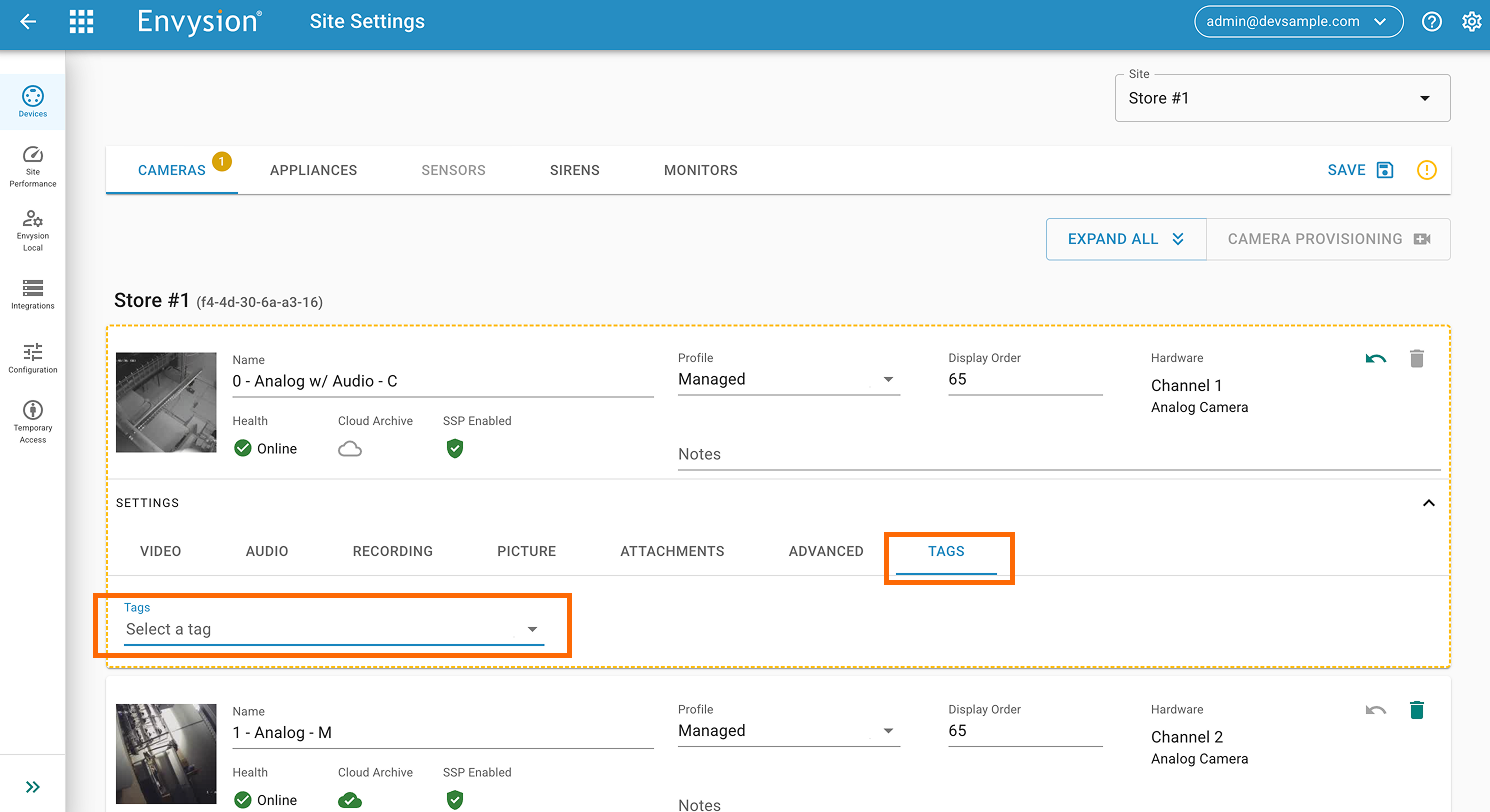
4. Apply the Auxiliary Tag: Within the camera settings, click on the Tags tab. You will see a “Tags” component with a “Select a tag” dropdown. Click the arrow and select the “auxiliary” tag. (Note: Currently, “Auxiliary” is the primary tag available for this workflow).
5. Verify the Tag: Confirm that the “auxiliary” tag now appears within the Tags component.
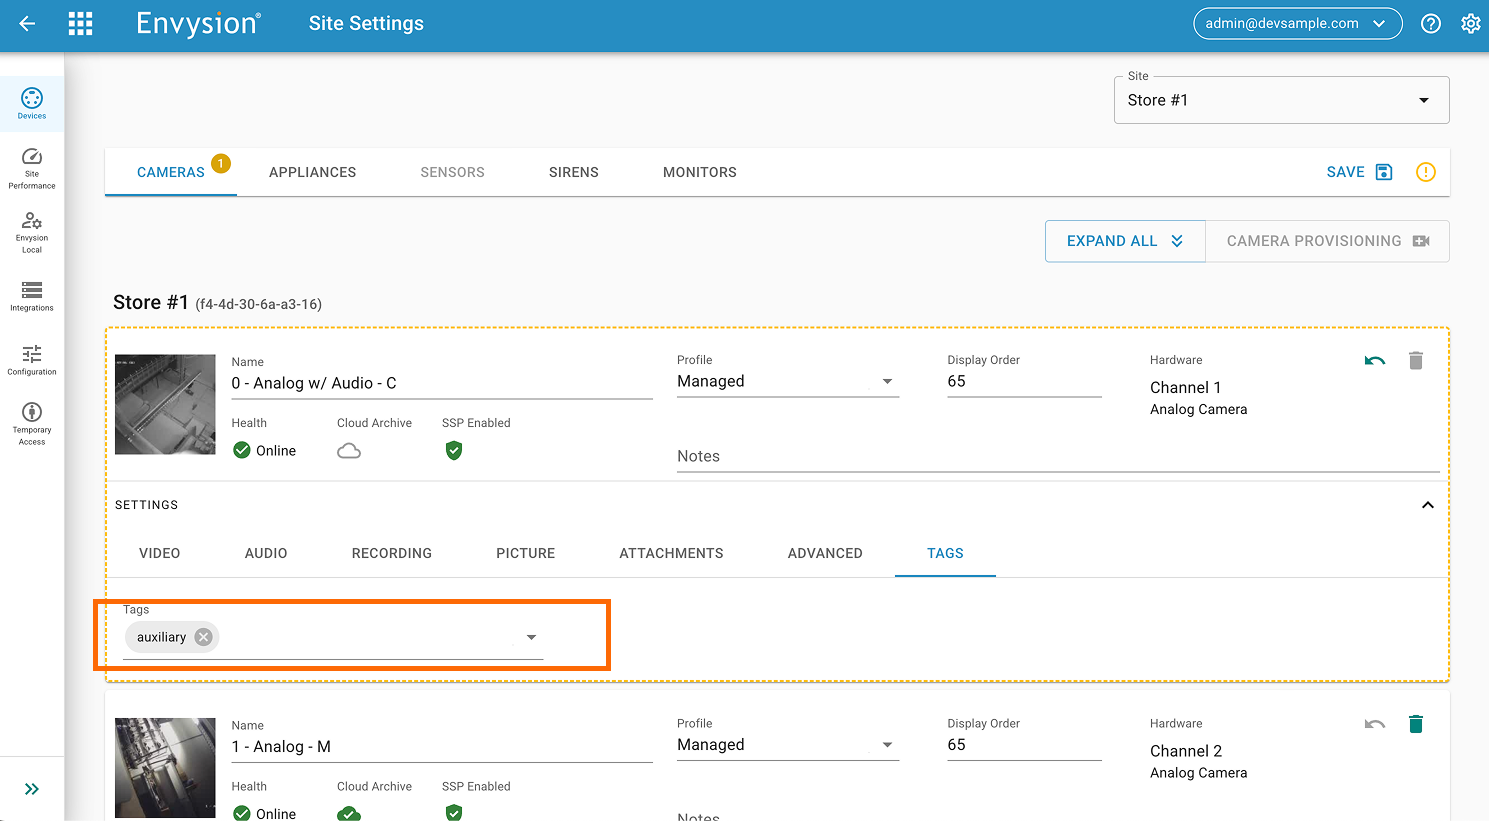
6. Save Changes: Click the Save button located in the top right corner of the page.
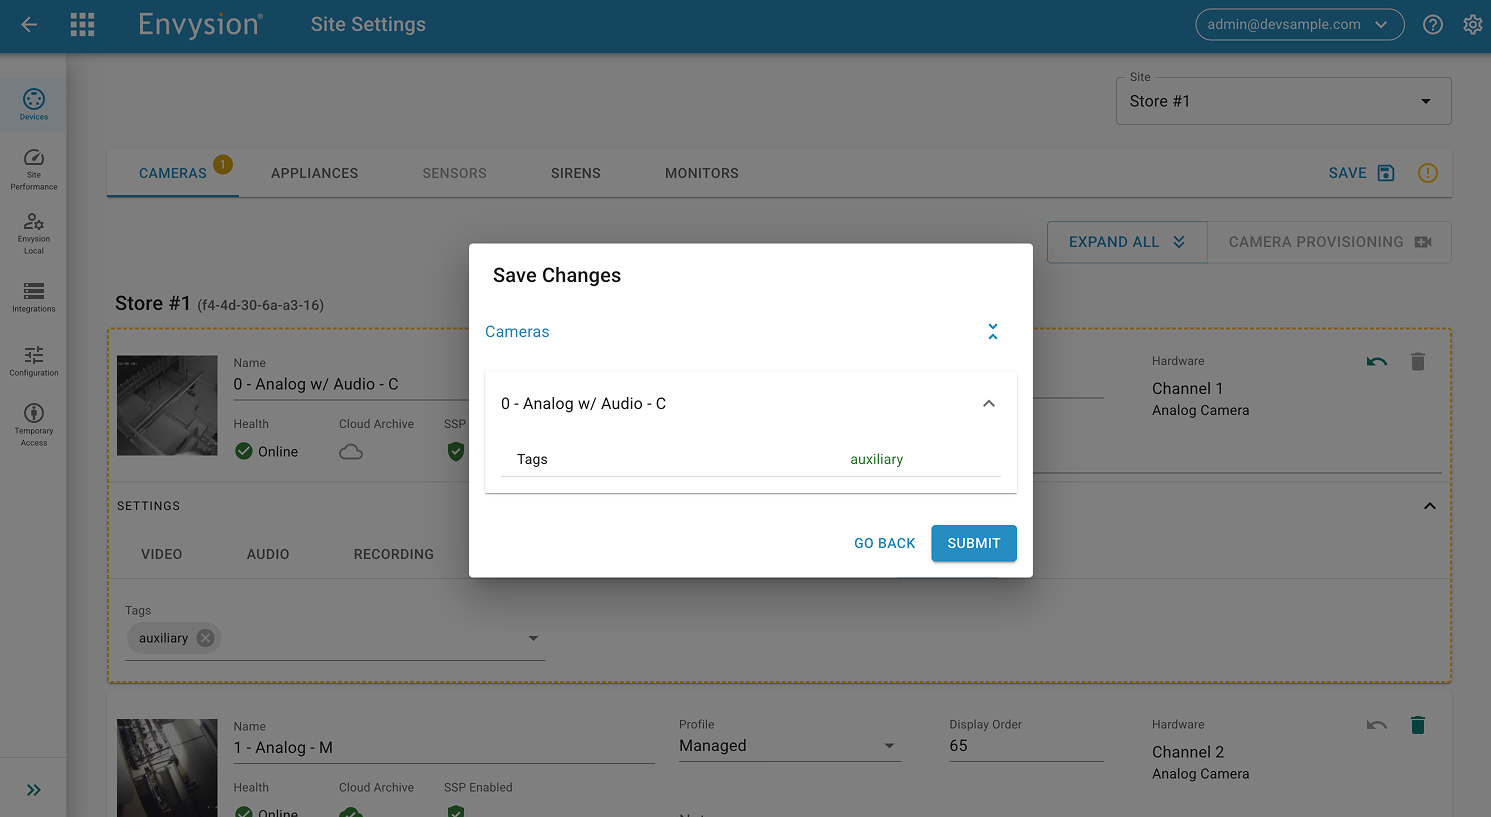
7. Review and Submit: A modal window will appear listing the changes you’ve made (confirming which tag was applied to which camera). Click the Submit button.
8. Confirmation: Once the changes are applied, a green Success message will appear at the top of the screen.
That’s it! Your site is now equipped with enhanced situational awareness.