Reports and Intelligence:
Customer Detection for Transactions
Video Analytics provides Envysion Reports with another layer of depth by which to surface transactions based on whether or not a customer or employee was present for that transaction.
Transactions with Customer Counts
Refunds equate to money lost from your bottom line, whether due to a guest’s dissatisfaction, or dishonest behavior by employees. While refunds should be a rare occurrence, the time to review refunds across your organization can become time consuming. Video Analytics can help reduce the number of refunds to review by analyzing the number of guests present during a refund transaction and inform you whether a guest was present or not without you having to open the video player.
Voids and No Sales are prime methods that employees can use to manipulate sales and steal from you and your customers. Video Analytics can help target which of transactions and events should be reviewed with urgency.
Paid Outs serve as legitimate events to remove cash from a register, such as for Safe Drops, Emergency Supply needs, or Lottery Payouts. Video Analytics can give you an upper hand on identify suspicious Paid Out activity, such as Lottery Redemptions when a customer is present to claim those winnings.
Setting up the AI
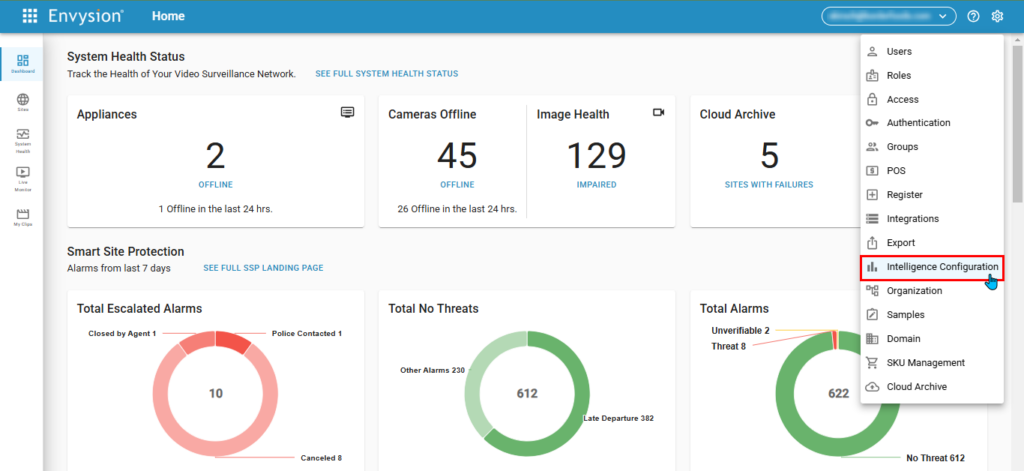
In order to begin configuring the video analytics for a site:
- Click the Gear Menu and select the Intelligence Configuration option from the menu
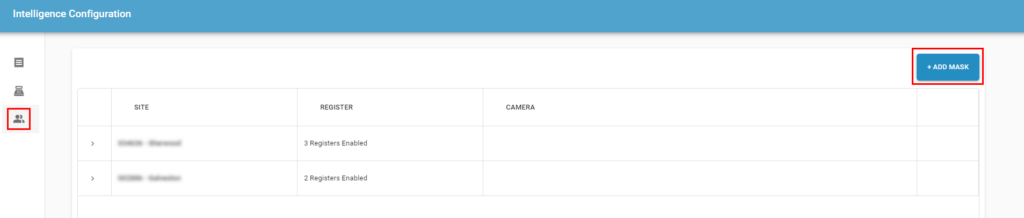
- On the Intelligence Configuration page, select the third option from the left sidebar to launch the mask screen configuration, then click the “Add Mask” button in the top right corner of the page. The table will show sites and registers that are already configured.
- Select the desired Site, Register, Camera, and Analytic then click on the grid boxes that you expect a customer to be in at the end of a transaction.
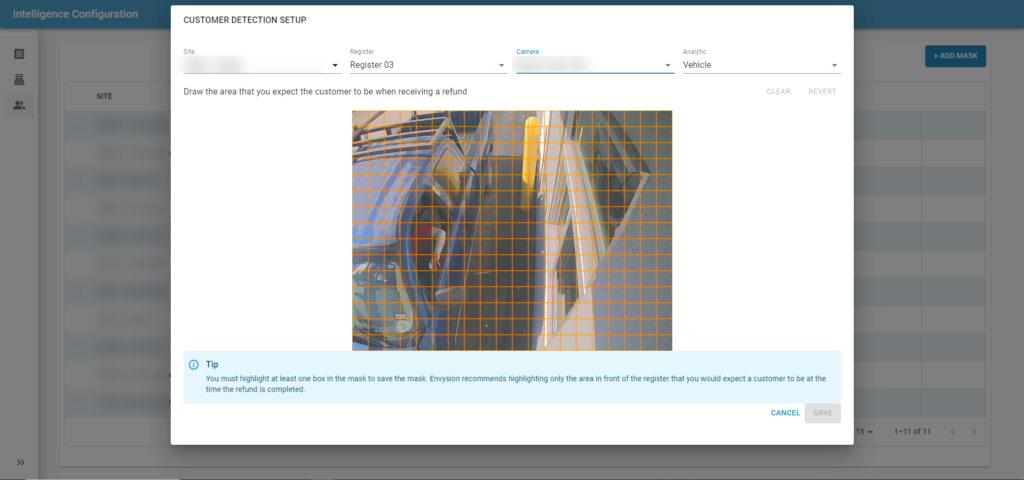
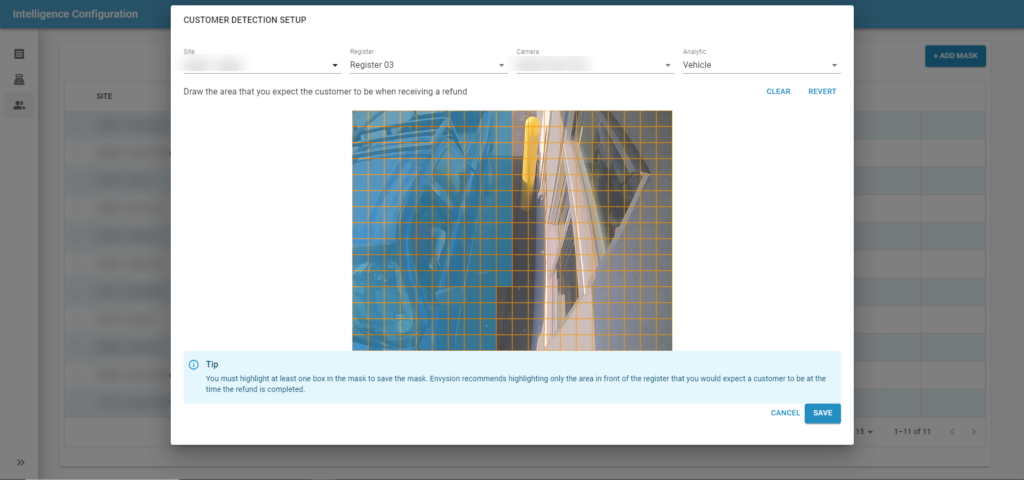
- Click the “Save” button to create the mask and enable analytics for refund transactions conducted at that location on that register.
- Repeat steps 1 – 4 for other registers at that location.
Notes:
The mask configuration tool does not automatically choose a camera based on it being mapped to the register for traditional video playback because we understand that sometimes constraints around camera positions means that the camera normally used to review the employee actions for transactions may not be the best view for analyzing the customer side of the counter. This allows the user the flexibility to select the best camera for the customer side of the counter if analyzing refund transactions at the front counter.
When setting up a mask, the tool only allows for one camera to be masked per register to prevent any potential conflicts in results. Each new register mask will trigger a seven day lookback at refund transactions on that register for video analysis to provide users immediate feedback when running the report (see below) on the results of that mask.
Run the Report
- From the Intelligence page, select the Report Templates and choose the Refunds, Line Void, or Transaction report.
- Click the “Customize” button and add the new “Person Count” filter to the report.
- Set the logic operator to your desired comparison and add a value for how many persons you are interested in knowing about, for example setting the logic operator to “EQUALS” and the value to “0”.
- Optional: add other filters to continue to refine the query parameters, such as the tender filter to look for refunds being issued to credit cards when no one is on the customer side of the register.
- Run the report.
Users will now see a reduced number of refund transactions based on the supplied filters. Drilling down to the receipt level of any group will display a new field that will display the count of people counted in that masked area for that transaction. Clicking on the row will open the video player and receipt view as normal for review. Existing user reports saved from these report can also take advantage of this new filter. Simply add the filter to your existing filters, run the report, and save the new configuration.
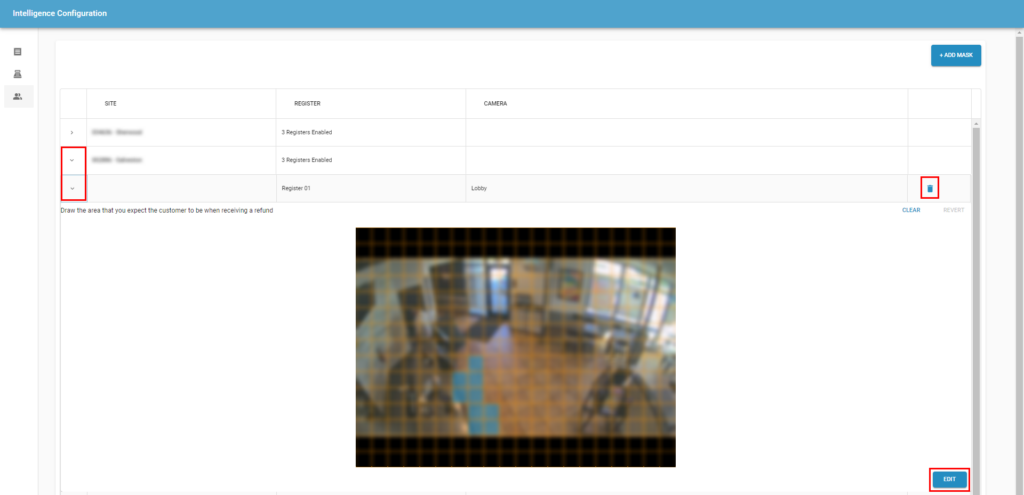
Editing the Mask
In order to make changes to existing mask configuration, from the setup screen, find the site in the configured sites table, and drill down to the specific register and the mask will be displayed. Click the edit button to make any changes and then click save to update the mask configuration. There are options to revert and cancel changes as well once editing is enabled. If you want to change the camera the mask is associated with, you must click the trash-can icon and delete the mask, then create a new mask using the setup steps above.