Smart Site Protection™:
Reviewing Alarm Events – mobile view
SSP mobile Alarm Events page
To review alarm events in the mobile app:
1. Select “Security” from the Workspace menu.
2. Choose “Alarm Events” from the bottom navigation bar.
3. Select your desired site from the automatically opened site picker (you can use the search functionality)
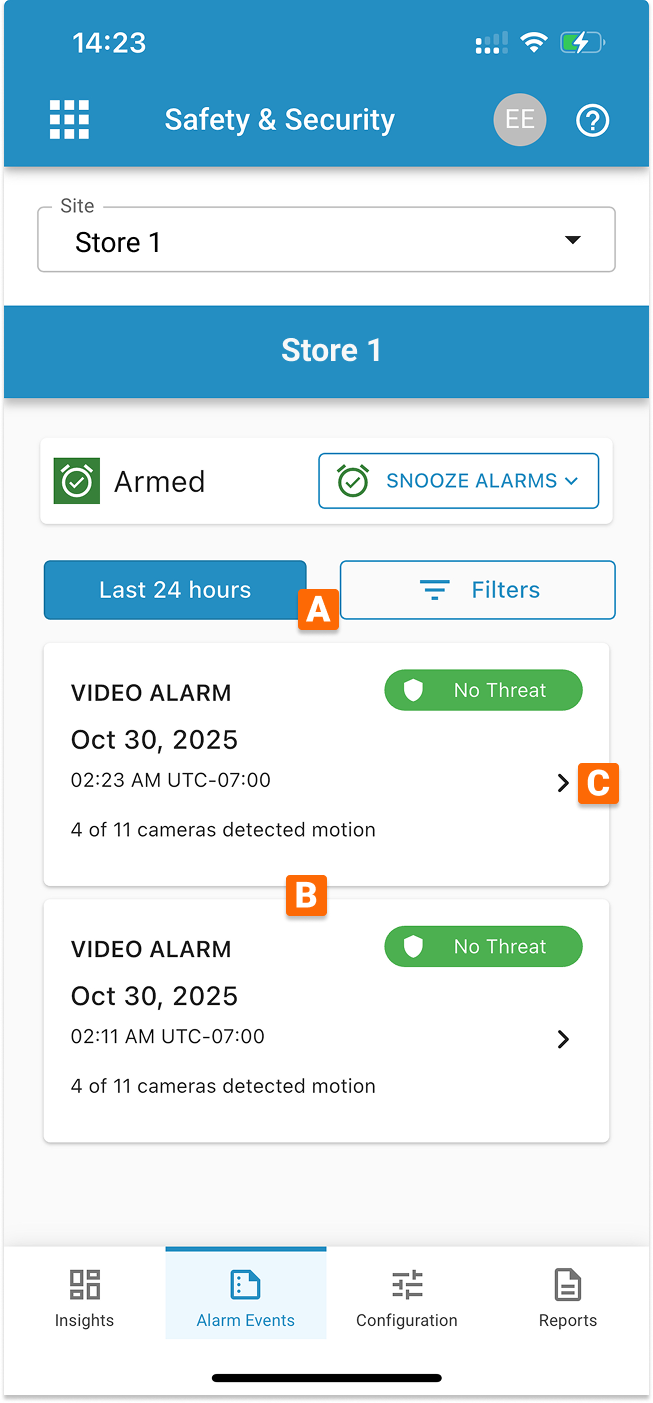 On the Alarm Events page, users can:
A) filter events by date range and threat verification status,
B) review past alarm events for up to 90 days,
C) open the details for each alarm event,
To filter event by date:
- Select range by clicking on the Filters or “Last 7 days” buttons.
- Click the Date Range selector to open the drop down list.
- Choose the predefined period or custom range from the list.
- If you choose a custom range, a new screen appears.
- Click the Edit button to input the required date from the keyboard or by clicking on the calendar choose the date range.
- Click Save to set a new date range on data.
- Click Apply to show the filtration results.
To filter by verification status:
- Select range by clicking on the Filters or “Last 7 days” buttons.
- Click on the buttons with verifications statuses names.
- By default all statuses are presented, so unclicking the button will remove those events from the presented list. This action will make the button gray.
- Click Apply to show the filtration results.
SSP mobile Alarm Details page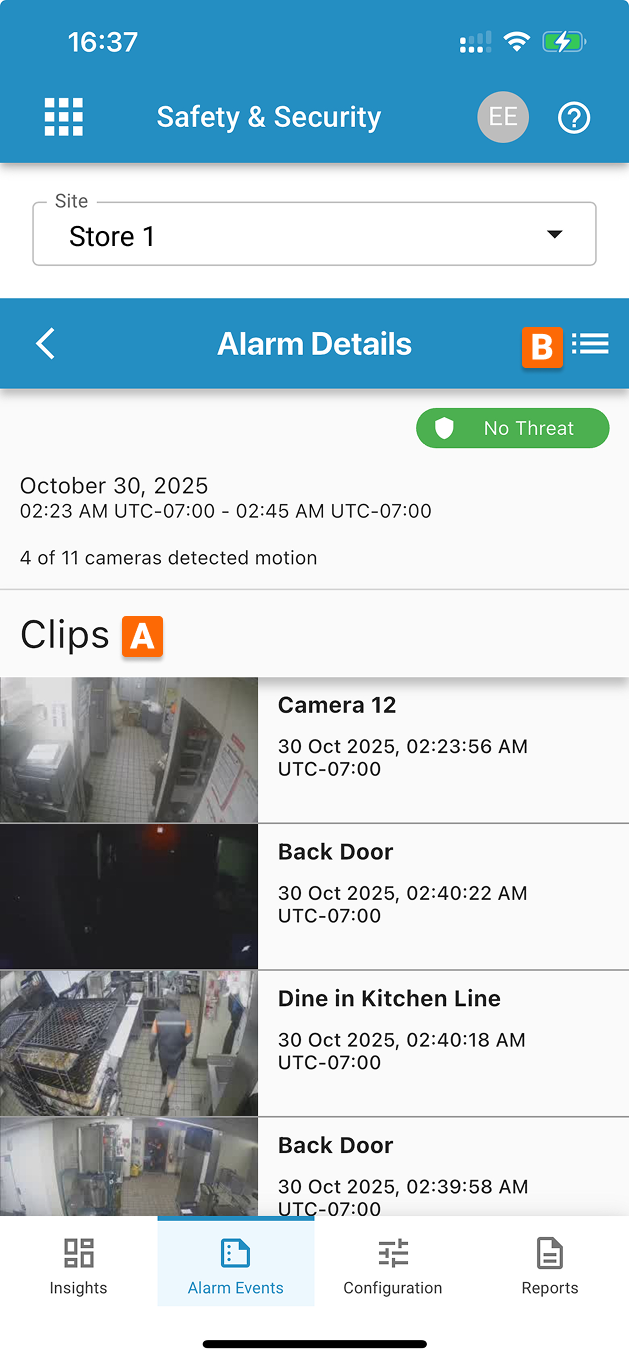
To check details of particular alarm event:
- Go to the SSP Alarm Events page.
- Click on the chosen event from the list.
- You will see clips connected with that particular event. Click on the one which you would like to see to open the video player.
Through this page, users can:
A) Review video clips, which registered movement.
B) Review alarm’s Activity Log.
Was this post helpful?
Let us know if you liked the post. That’s the only way we can improve.