Configuring IP Cameras for EnVR:
How to Manually Add a Camera
When will you need to add a camera manually?
There are some cameras that need to be programmed inside the camera before this process takes place, most of them are brands and models that we do not sell.
Video Links:
Manually Provisioning a Camera not discovered by Device Manager
Manually Provisioning Unmanaged Cameras
Steps:
- Log into Envysion App, Navigate to your site page.
- Select Site settings on the Right.

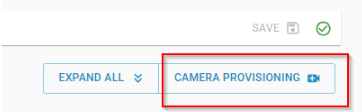
- Click on the camera icon located at the top right corner to open ‘Camera Provisioning’
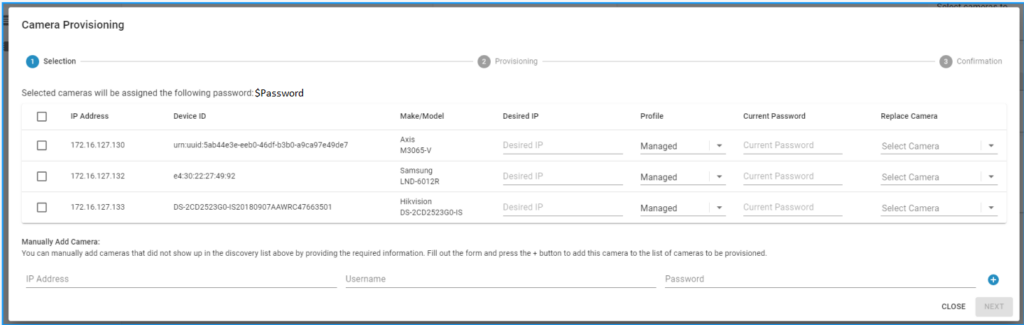
- It will automatically do an initial search for cameras and it may not find anything. To manually add a camera, type in the:
- IP address of where the camera is
- username
- password

- Click on the blue circle with the white + sign to select the camera.
- If you are adding multiple cameras, repeat step #3 and #4 for each camera that you are adding
- Once you have selected all of the cameras that need to be added, click on the ‘Next’ button. The system will try to access the camera and connect. (You will see an orange circle spinning.)


- If you get an error message, “Some cameras were not provisioned”, it means that the camera has not been added to the device management tool, not that you are unable to use the camera. In the event that a camera is unable to be probed, or there is an intermittent failure with the probe there is going to be the option to retry the camera add.
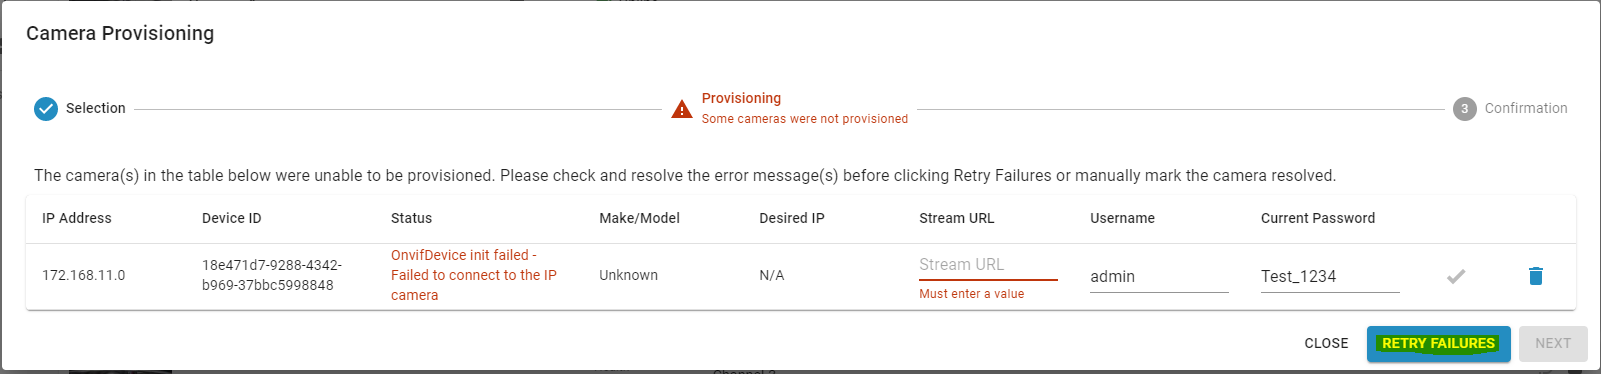
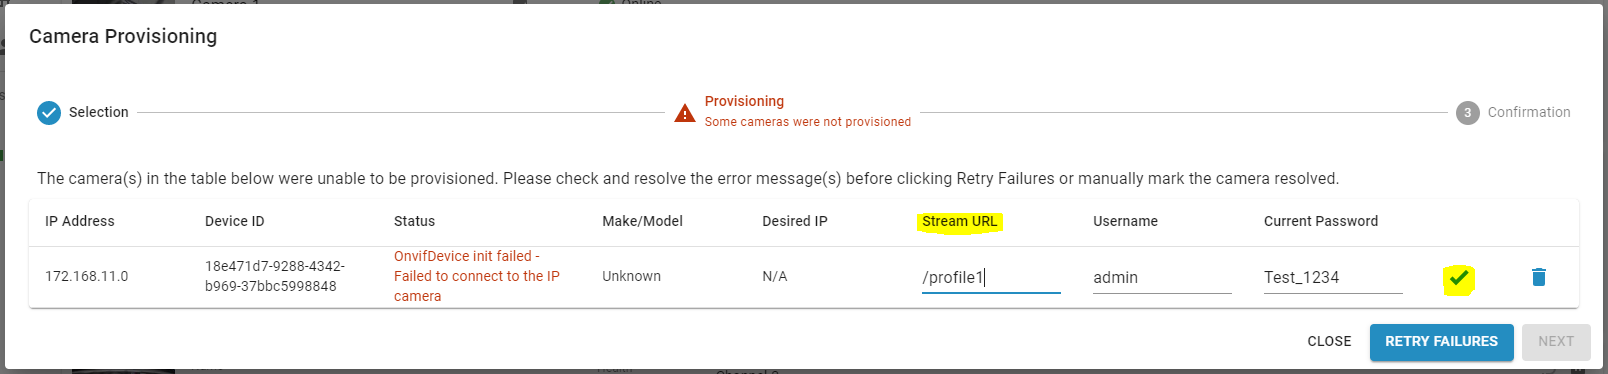
- In the event the probe fails to identify the camera properly, if known, it will be necessary to supply a stream URL to the given camera. Once the ‘Stream URL’ information is added, click on the blue check mark.
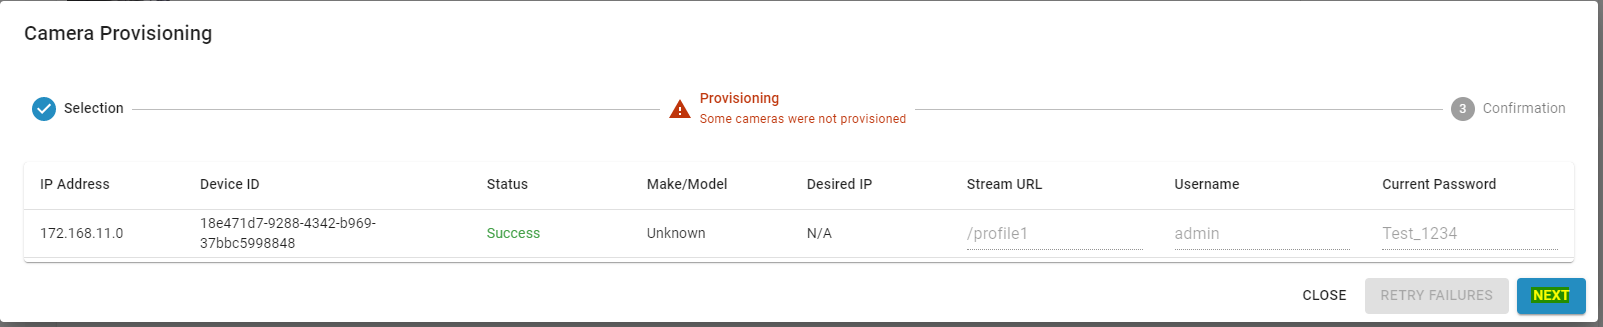
- Click ‘Next’
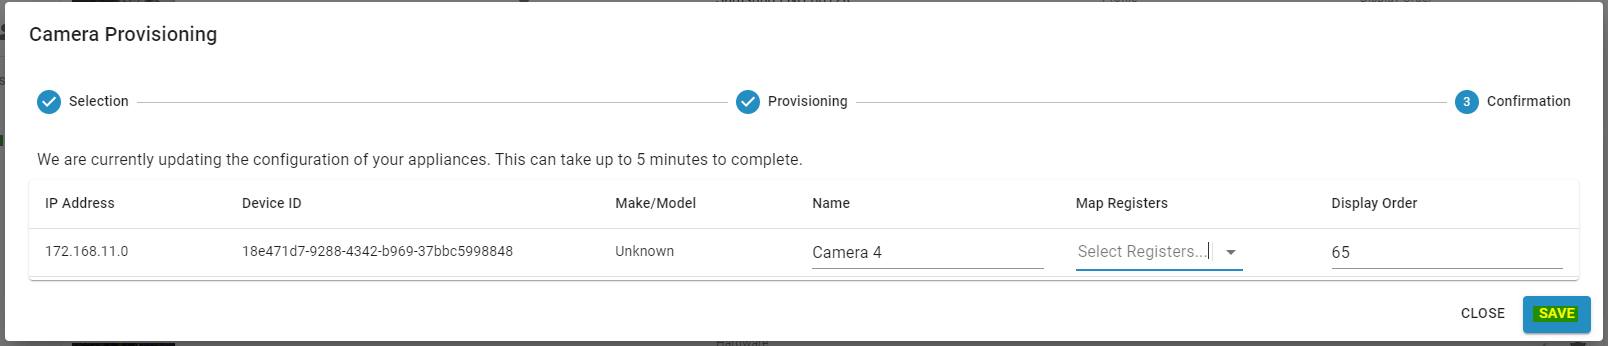
- Click ‘Save’
Was this post helpful?
Let us know if you liked the post. That’s the only way we can improve.