Physical Installation Procedures:
Panic Button Installation
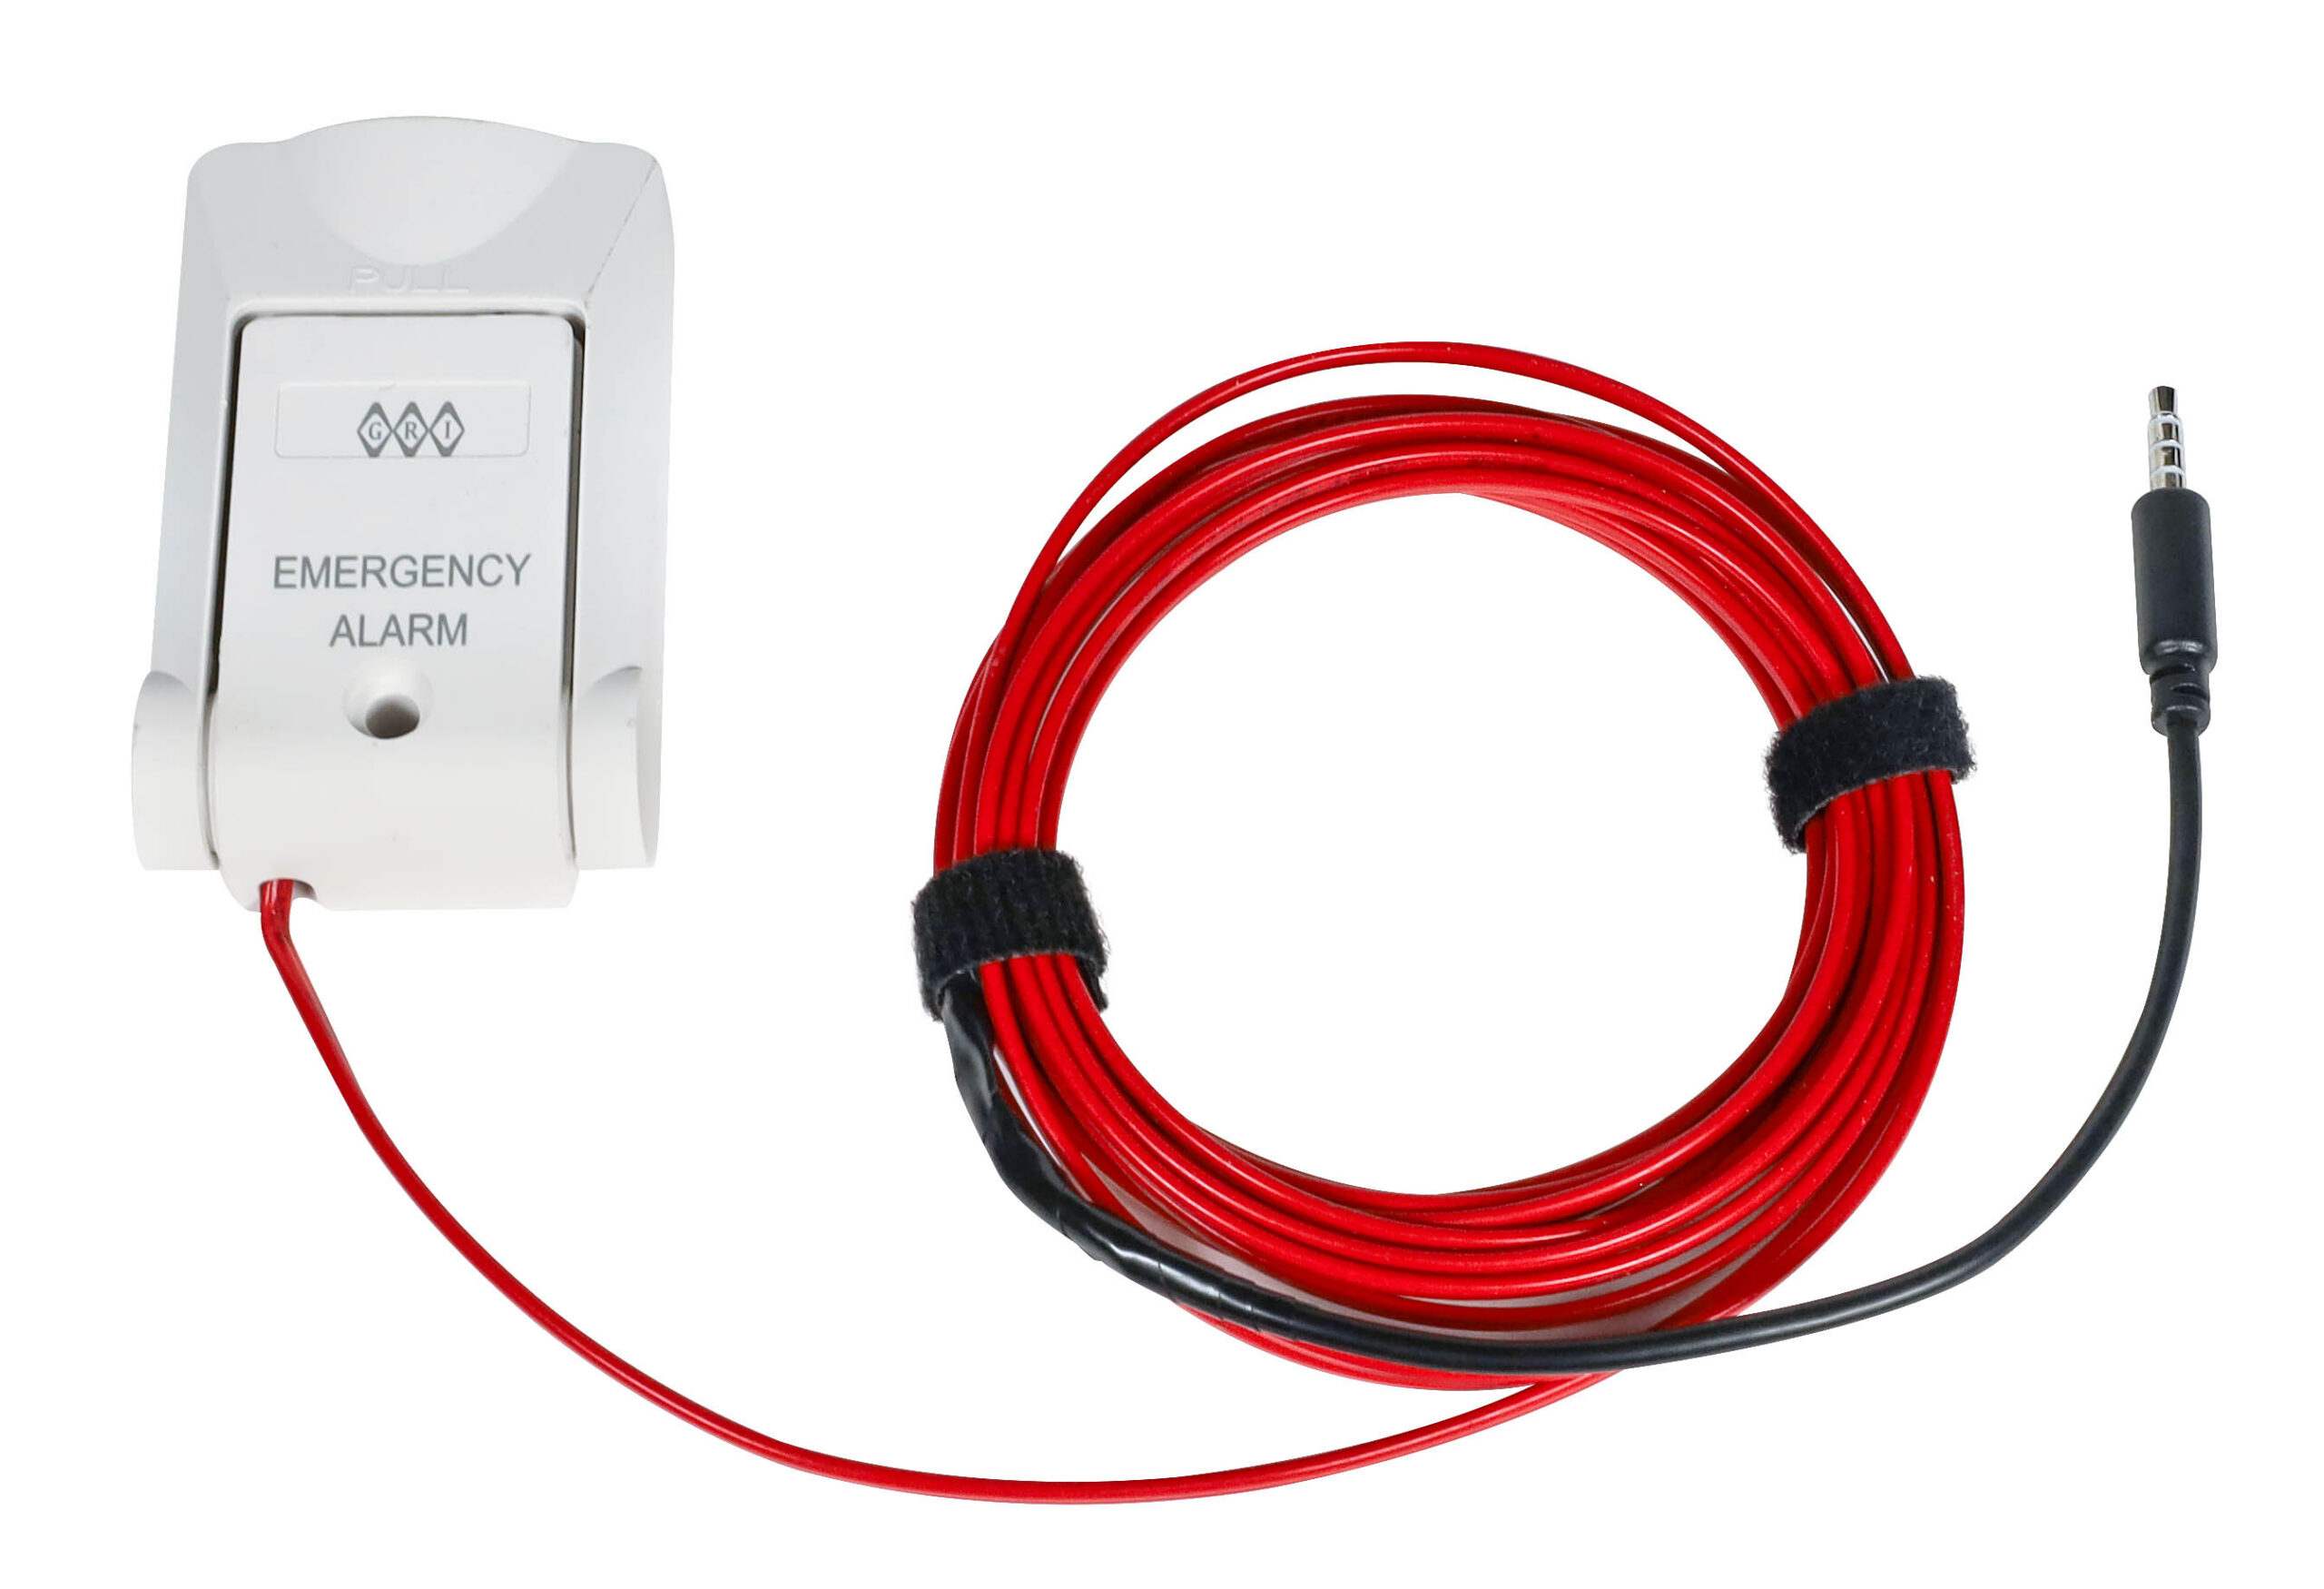
Panic Button In Cooler/Freezer Switch
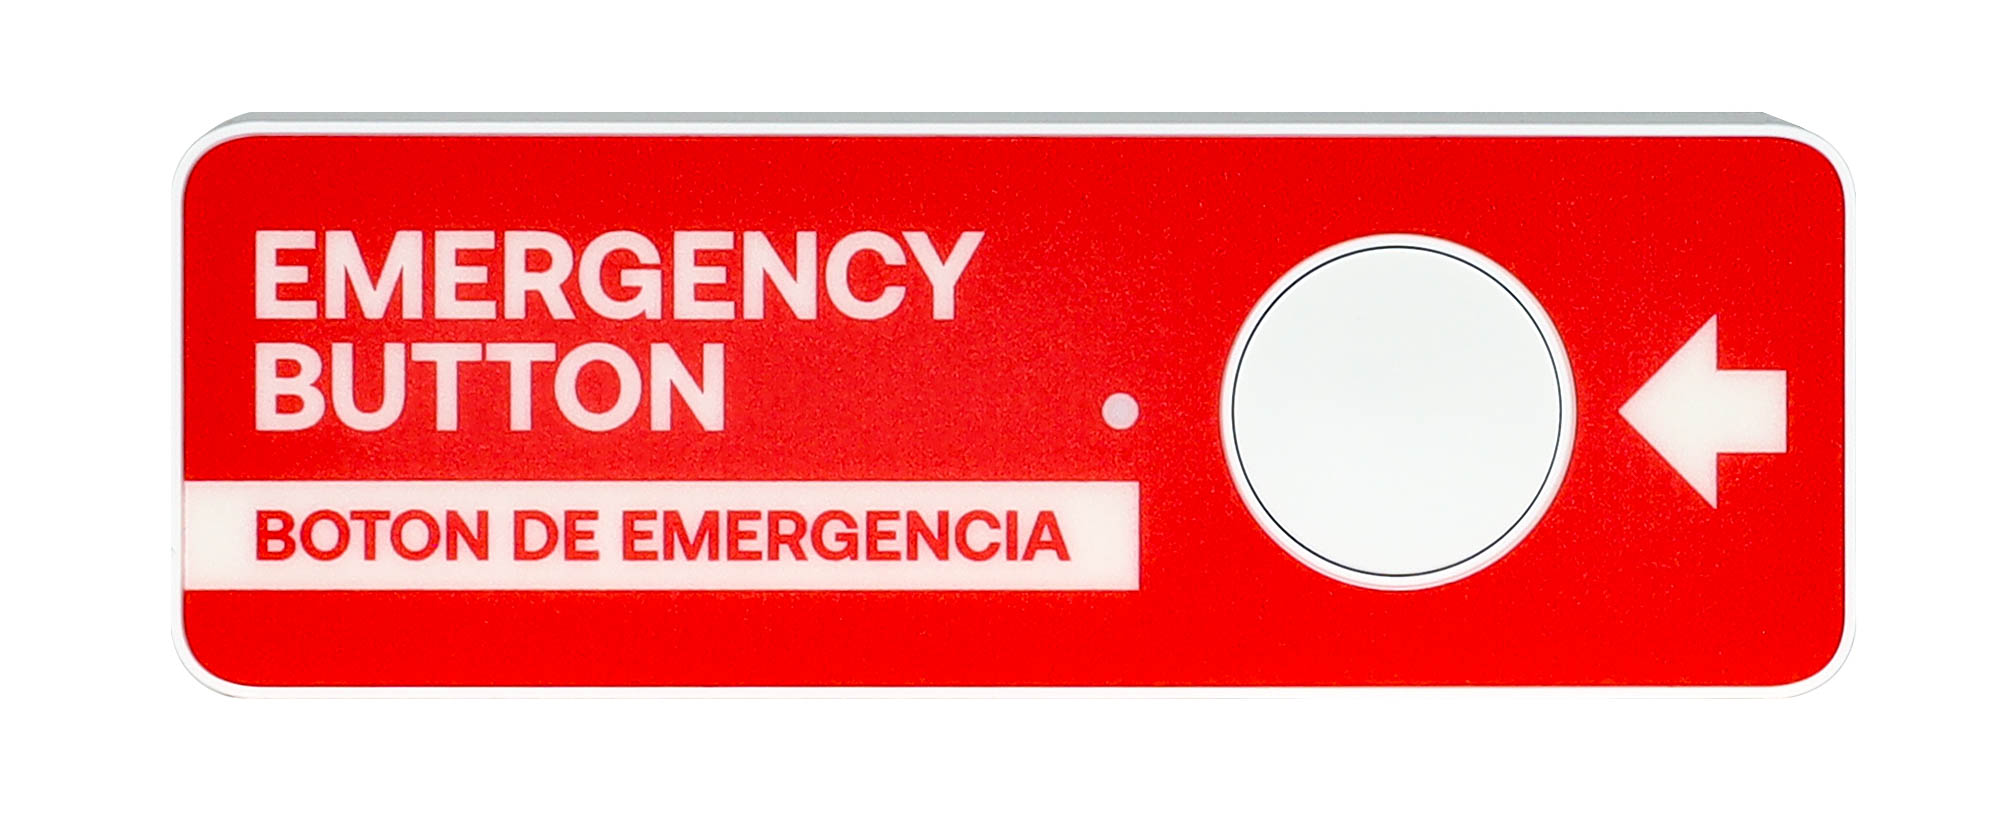
Panic Button
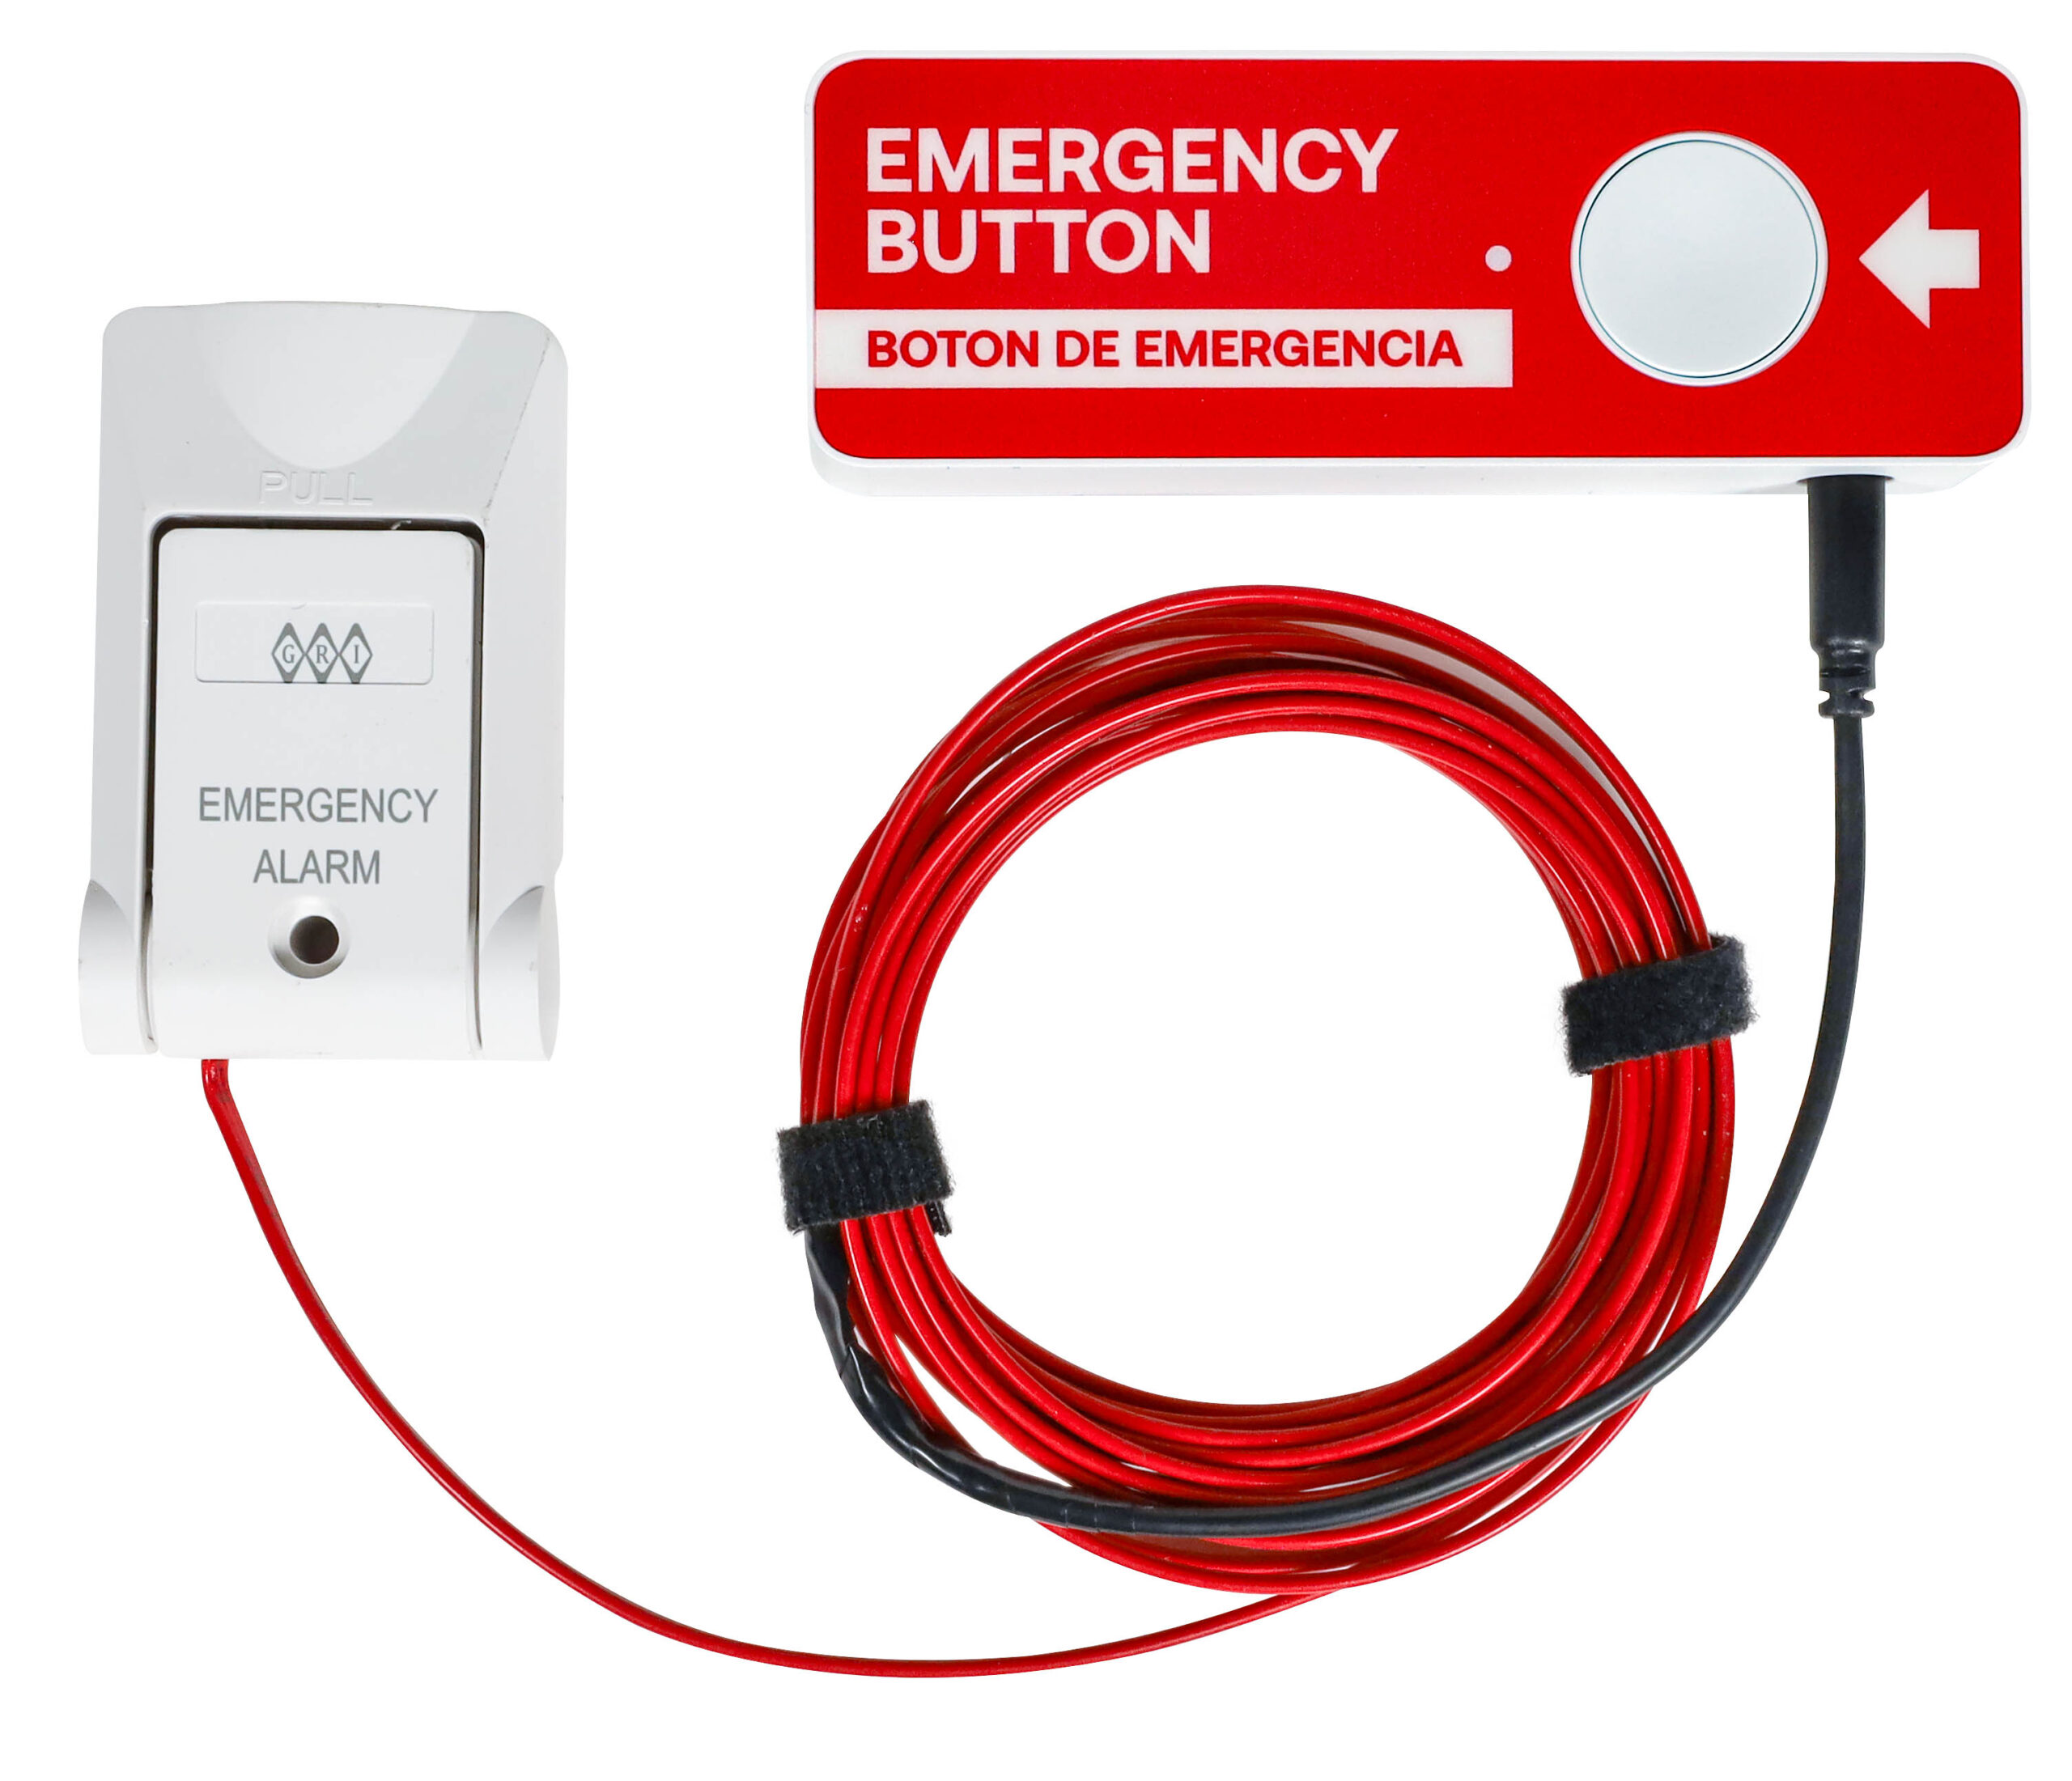
Panic Button and In Cooler Switch connected
During Installation please press and hold the button initially until the led color changes to green. This will ensure that it is properly communicating with the server.
Required for installation:
- Size 00 Phillips Head Screwdriver
- 2 AA Batteries Energizer Industrial Alkaline 1.5 Volt EN91
- If Buttons were Activated Previously, they Must be in Test Mode before removing batteries as this will contact the authorities if it is Active.
Standardization of assigned camera views for Panic Buttons
- Back Door
- Largest area of the Lobby
- Drive Thru Window
- Camera where the button is located (ie: Office, Cooler, Front Counter, if Drive Thru the Exterior shot of that Location)
There are also New Panic Button Holsters for mounting the Panic Button to the wall with extra hold. This bracket will need two fasteners specific for the material in which you are mounting.

- Surface Preparation & Location
- Versatile Placement: The bracket is designed for flat surfaces, including desks, walls, or kiosks.
- Optimal Accessibility: Mount the bracket in a consistent location to ensure reliable operation for end-users.
- Orientation: Use a level to ensure the bracket is plumb (vertical) or level (horizontal) to maintain a professional appearance and ease of button interaction.
- Surface Cleaning: For all mounting methods, ensure the target surface is clean, dry, and free of dust or oils.
- Mechanical Fastening (Screw Mount)
- Hardware Specification: Use two (2) M4 Pan Head Phillips screws.
- Screw Length: Ensure screws have a minimum length of 15.0 mm or ⅝ inch to provide adequate engagement with the mounting surface.
- Pilot Holes: For dense materials (hardwood, plastic, or studs), pre-drill pilot holes to prevent fastener stripping or material cracking.
- Material Compatibility: Select screw threads specific to your mounting substrate (e.g., wood screws for timber, self-tapping for thin metal, or masonry anchors for brick).
- Alternative Mounting (Adhesive)
- Non-Invasive Install: For surfaces where drilling is not possible—such as metal counters or tile walls—apply a high-quality industrial adhesive or heavy-duty mounting tape to the back of the bracket.
- Cure Time: If using adhesive, allow it to fully cure according to the manufacturer’s instructions before clipping the LTE-M button into the bracket.
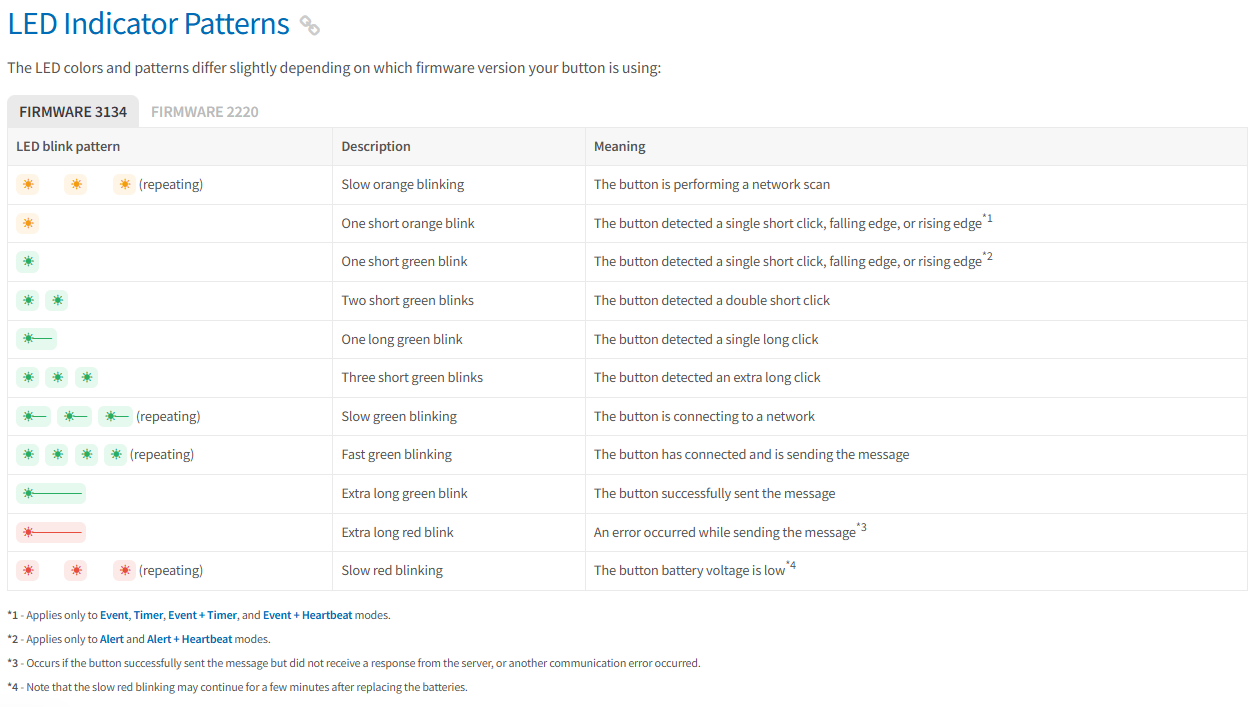
Indicator lights assist in set up and troubleshooting
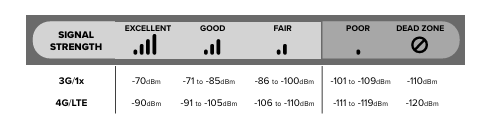
We also collect signal strength information at the location using the weBoost application on your cellular device. This can be obtained either through the play store for android or from the iOS app store.
weBoost Signal Booster
For locations that have poor cellular coverage indoors.
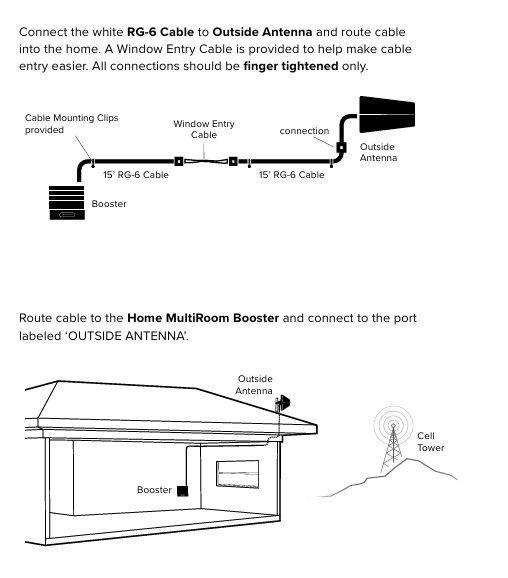
User Manual: weBoost User Manual
Informational Video: weBoost Home Multiroom
Panic Button Install Videos
Panic Button Install without the Cooler Switch / Cooler Panic Button & Switch Pre-Install & Setup
Cooler Panic Button & Switch Quick Connection Install
Cooler Panic Button & Switch Full Install