Envysion Local:
Download Clips from Envysion Local
In the event that you need to download video footage from and EnVR and the sites Internet connection is down or impaired, Envysion Local provides an intuitive interface to export video clips to a USB mass storage device.
Accessing Envysion Local
- Connect a keyboard to the back of the EnVR, access Envysion Local by holding Alt and then pressing Tab
- Login into Envysion Local with your credentials
- If you do not have Envysion Local credentials, reach out to Envysion support to request access
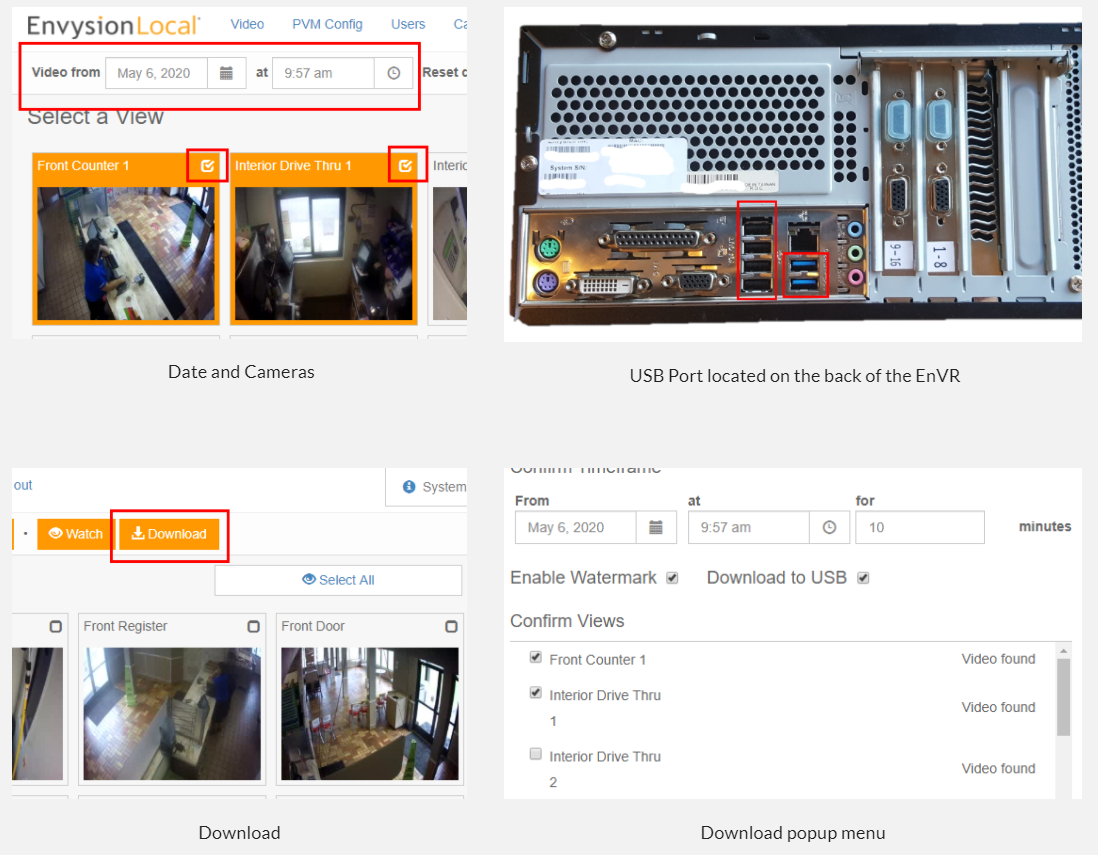
Downloading Clips
To download a clip of the recorded video:
- Verify clip availability by setting the date and camera view(s) as shown in the image below. If the clip plays, continue with the following steps.
- You cannot create a clip for a specific time if the video is not playing or there is no video.
- Insert a USB storage drive into an available USB port on the back of EnVR.
- Click the Download button. The clips for the Individual cameras will be made available for download.
- On the Download pop-up menu, mark the Enable Watermark and Download to USB (should already be
marked) checkbox. The Enable Watermark feature will create a text overlay on each clip that denotes
the date, time, EnVR, and Camera name.- The Confirm Views list also indicates video availability for the selected timeframe. Video may not appear if no motion was detected or if the camera was offline during that period.
- Click the Download button and the clip(s) will download to your USB drive.
- Once complete, you will be prompted to remove the USB Drive from the EnVR.
- Connect the USB to a PC/Laptop and confirm the video is viewable.
Customers should NOT be sending DVRs back to Envysion directly as a means to request footage be exported or preserved. If an ENVR is sent back to Envysion (warehouse) the customer should expect it will be wiped clean upon receipt.
Was this post helpful?
Let us know if you liked the post. That’s the only way we can improve.