Device Management:
Camera Network Configuration
Guidelines for Network Setup
To protect your network against attacks and ensure video is successfully transmitted from the camera to the EnVR, follow the guidelines below:
- Isolate the camera network from the external network connected to the internet
- Avoid cascading switches as this will reduce fault tolerance and may create network bottlenecks.
- Minimize the number of switches on a critical path to decrease the chance of a single switch failure that can sever the connection to a large group of cameras.
Suggested network configuration – Using the camera network
Envysion recommends only connecting the Primary NIC of the EnVR to the site network and making use of the camera network associated with the Secondary NIC. This configuration removes any additional network traffic from the cameras to the EnVR from the site network and avoids problems with camera configuration caused by some site network routers and switches.
Here is a suggested network setup for an Envysion system:
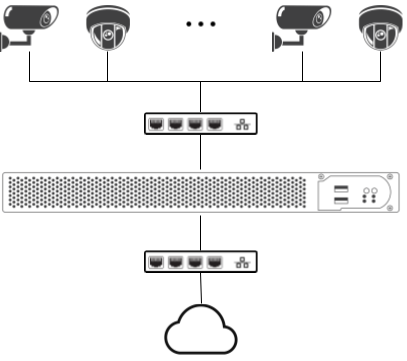
In this configuration, the EnVR is connected to both the site network (on the Primary NIC) and the camera network (on the Secondary NIC). Cameras are connected to one or more switches, which composes the camera network. If using multiple switches, try to avoid chaining together multiple switches as this can lead to network congestion and reliability problems.
This configuration can also be done using multiple VLANs on a single switch, for more information about setting up VLANs on a switch please refer to the vendor documentation for the switch. The EnVR does not support VLAG tagging so the port(s) the EnVR is connected to will need to be setup to apply the VLAN tags.
Note: Do not connect other devices or computers to the camera network as that network will not have access to the site network or the internet.
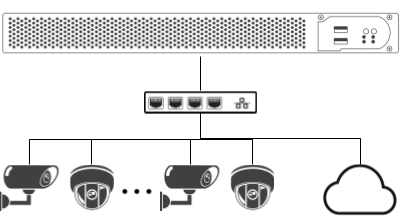
Alternate network configuration – Cameras on the site network
This network configuration should be used in either of the following situations:
- There is a need for systems other than the EnVR to access the cameras
- A switch for the camera network is not available or the primary switch does not support VLAN segmentation
In this configuration, the EnVR is only connected to the site network via the Primary NIC and all cameras are connected to the site network as well.
Device provisioning supports assigning cameras to a virtual network associated with the physical site network and will by default assign cameras found on the site network to this virtual network. If the desire is to have the cameras be accessible from the site network, then the desired IP(s) for those cameras will need to be provided as part of the device provisioning process.
If you have a more complex deployment or have a significant number of cameras, please contact your Envysion representative, so our system engineers can support your network setup.
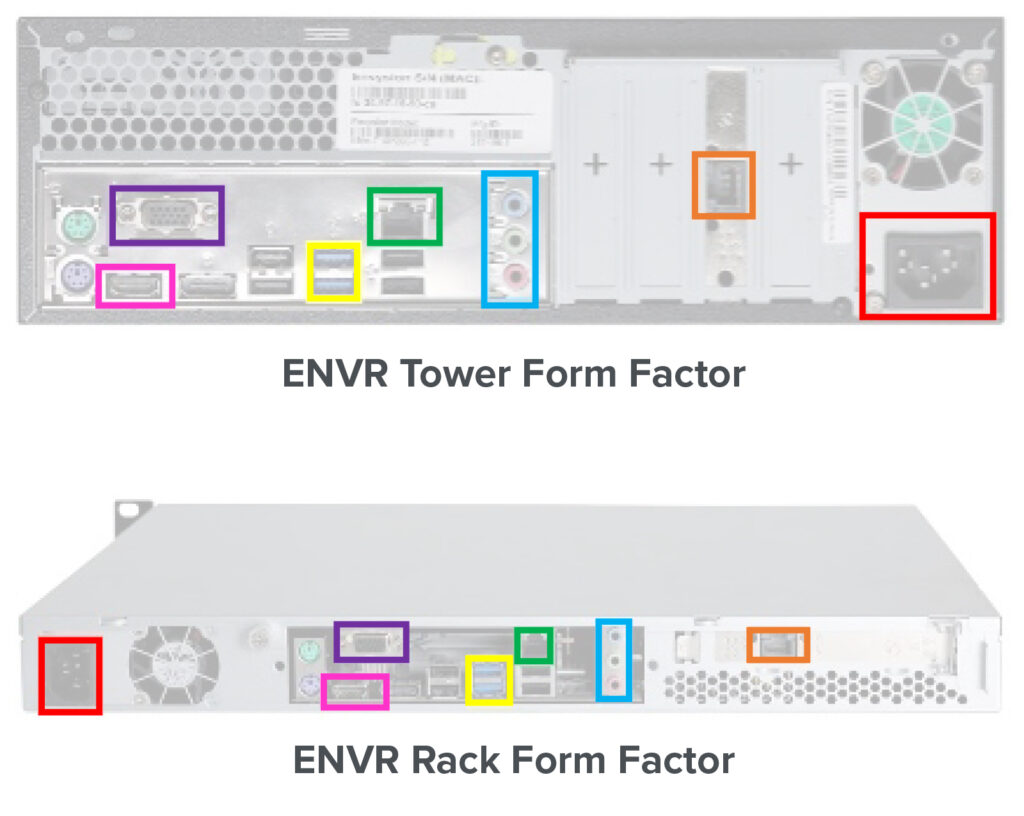
How to install and configure network settings on the EnVR
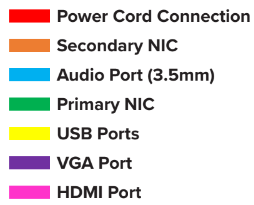
The diagram below shows the connections on the back of the tower/desktop form-factor EnVR and the rack mountable form-factor EnVR.
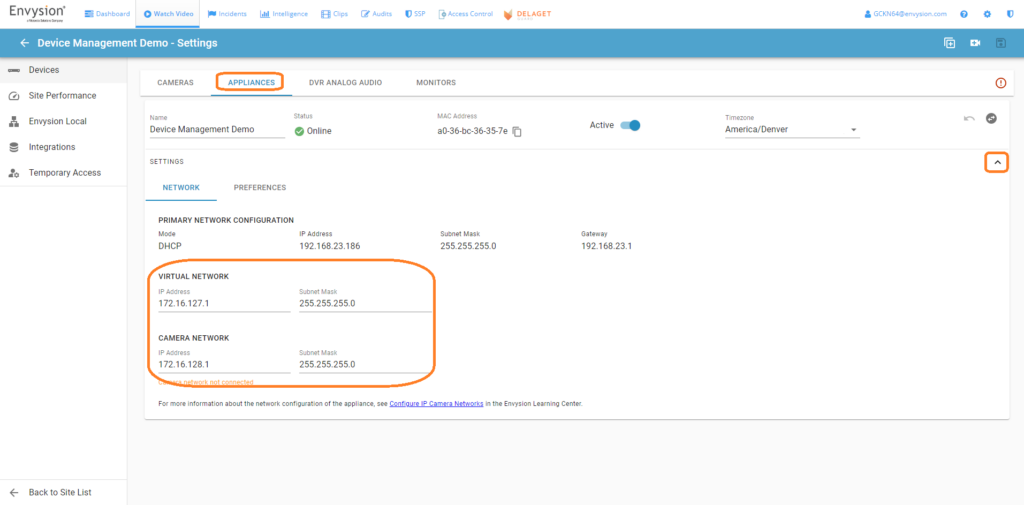
Configure Network Settings in Envysion
To configure an appliance’s network settings:
- Go to the Watch Video tab.
- Choose the Site you are interested in configuring.
- Open Site Settings by clicking a button on the left bottom corner.
- Open Appliances tab.
- Expand Settings.
- Filled in your network settings. Adjust the virtual and camera network settings as needed to match the desired configuration.