Audit Services:
Reviewing Incidents from Envysion Loss Prevention
Incident Management users will access Incident Management from the Envysion Workspace Menu. Incident Management tells the story of theft, loss, or operational issues over recent weeks in a particular restaurant. These incidents help you to understand where your attention is most needed. You can get to the Incidents tab either by following a link in one of your Incident Management Notifications or you can navigate directly within the Envysion Application. In the Incidents tab, you have the option to view all Incidents or to sort the Incidents by the employee who has been identified with the Incident. You can sort by Incident Number, Category, Last Activity, Employee, Incident Time, or the Age of the Incident since it was released to you in a notification. Click on any column heading to sort by that factor.
Initially, click on All Incidents to sort all your open Incidents by severity. Later, when you are ready to record the action you have taken, you can click on By Employee to sort open Incidents by the assigned employee. You will see a list of open incidents at the top of the display. Beneath that, you will see your resolved incidents.

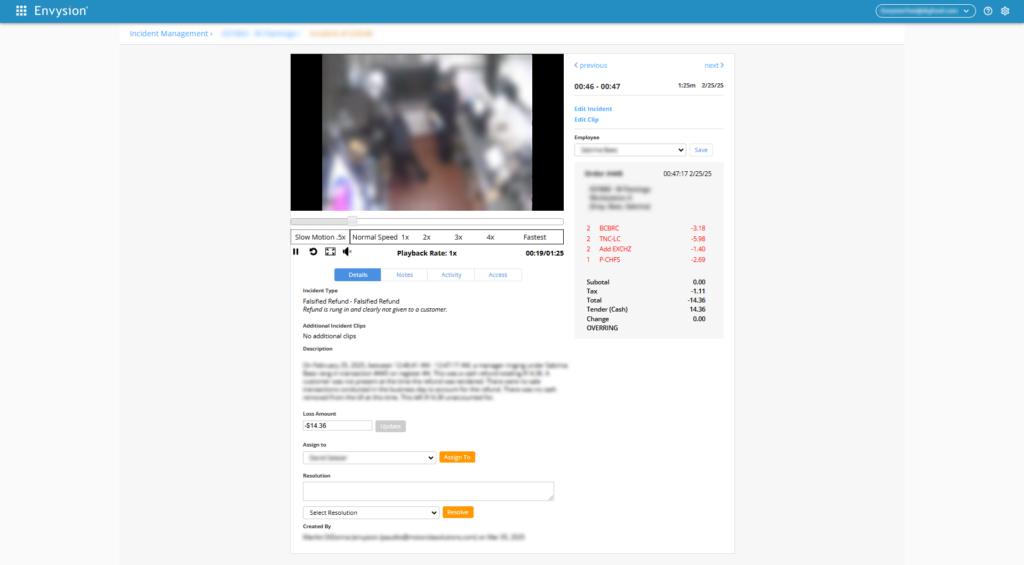
To view an Incident and any associated transactions:
- Click an Incident number to view individual Incidents.
- The video appears on the left
- The corresponding receipt appears on the right
- DVR controls include Pause/Play, Go back 30 seconds, and a selection of playback speeds
- A Full-Screen icon allows you to view the Incident at full resolution
- Above the Receipt, you can navigate to the next or previous transactions if you wish to view any context around the Incident itself.
- You can also change the Employee name associated with the Incident if the identification is incorrect. The menu next to the Employee name will list all employees who clock in through the POS. You also have the option to add an employee’s name to the list.