Appendix D: Encoder Quick Start Guide
Required Hardware:
- Paramont series encoder (PD2B-**** of PD1B-****)
- Monitor with VGA or HDMI input and cable
- USB Mouse
- Ethernet cable
Startup Wizard:
- After powering on the device with a monitor and keyboard attached, it will show the Device Initialization
- Select your Time zone and click “Next Step”
- Modify the administrator password: enter <password provided on work order> in the new password field, confirm and click “Next Step”
- On the Security Question screen click “Next Step”
- On the Disk Management screen click “Next Step”
- On the Wizard screen uncheck “Enable Wizard next time”, and then click “Wizard Setup”
- On the Network Settings screen enter the following information:
- Uncheck ‘DHCP’
- IP Address – 172.16.127.2
- Subnet Mask – 255.255.255.0
- Gateway – 172.16.127.1
- Click “Next Step”
- On the Add Cameras screen click “Next Step”
- On the Recording Settings screen click “Next Step”
- On the QR Code screen click “Next Step”
- On the Cloud Upgrade screen uncheck “Enable”, then click “OK”
- From the Main Interface disable “OSD” for all cameras
- The “OSD” setting can also be found under Image Settings
Envysion Application Settings:
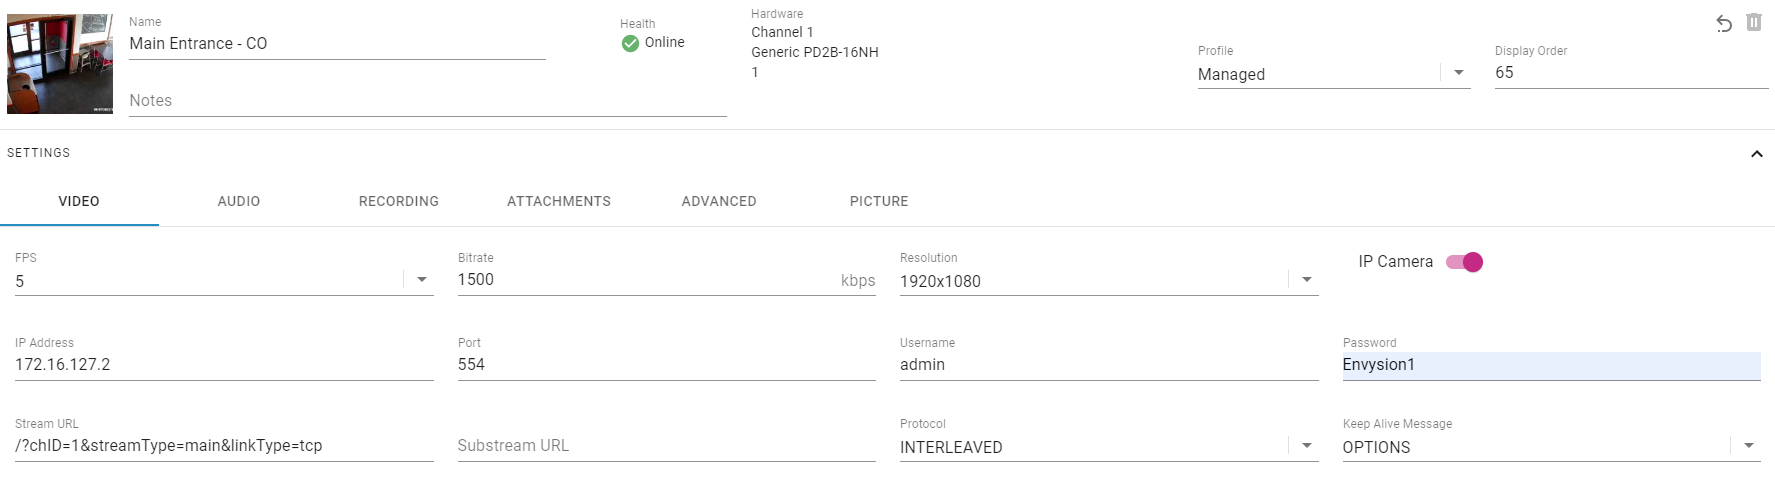
Camera Details:
- Enable IP Camera
- Set Resolution to 1920×1080
- Set Bitrate to 1536 Kbps
- Set Frame Rate between 5-15
- Current IP Address – 172.16.127.2
- Port – 554
- Path – /?chID=1&streamType=main&linkType=tcp where chID is the channel number, and streamType is the main, or substream. In the example above this will stream channel 1, main (mainstream)
- Make – Other
- Model – PD2B-8NH, PD2B-16NH, PD1B-16, or PD1B-32N based on number of channels (8, 16, or 32)
- Credentials – admin/Envysion1
- Communication Protocol – RTSP/RTP Interleave
- KeepAlive Message – Options
- Click Save
Was this post helpful?
Let us know if you liked the post. That’s the only way we can improve.