Device Management:
Configuring IP Cameras for EnVR
IP cameras in a factory default setting will need to be associated with the EnVR in the Envysion app to complete camera configuration. If not in Factory default setting, User Name and Password will be required. Fully managed cameras — from Axis, Samsung (Wisenet/Hanwha Techwin), Pelco, Invid and Hikvision — and other brands of compatible IP cameras can be discovered and added to the application in a simple bulk process, via the web application.
Prior to following these steps, it is expected that you have connected all your IP cameras to the same local network as the EnVR, so they can be discovered and subsequently staged in one operation. Any pre-staged cameras that are not on the network at the time of running the steps below may end up conflicting with cameras staged via this process.
Adding Cameras in the Web App
Video Links:
Adding New Managed Cameras – Video Walkthrough
Video Walkthrough Replace Camera
- Sign into the Envysion web app.
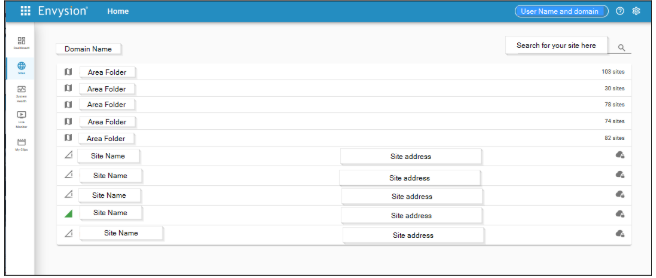
- Navigate to your site page.


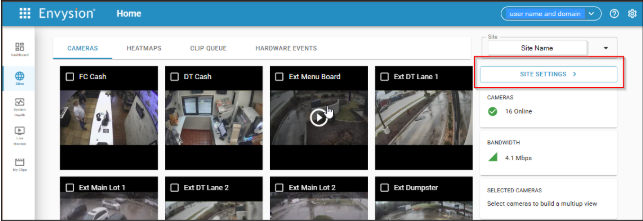
- Navigate to Site Settings.

- Select Add Cameras from the top right or from dialogue that appears on a site with no cameras.

- The EnVR will begin searching for any available cameras on the network.
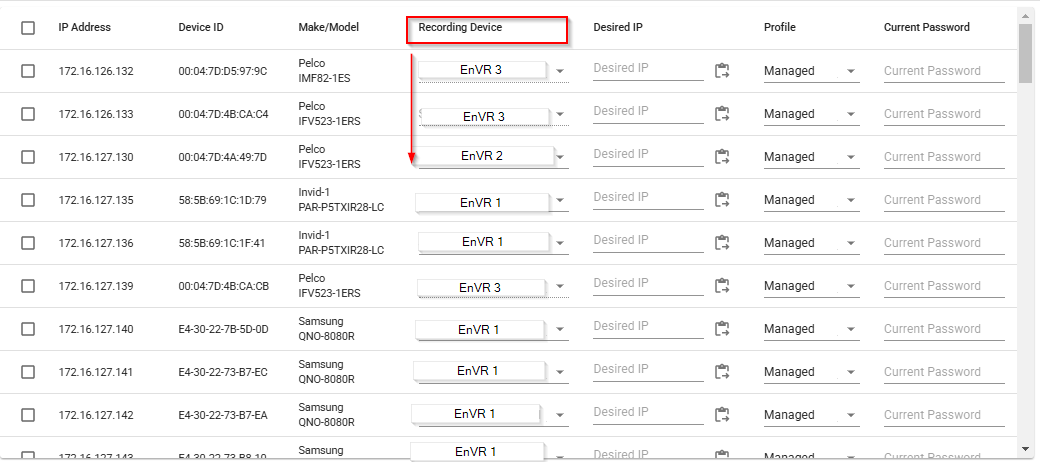
- If the site you are using has a single EnVR continue to step 7. If the site has multiple EnVRs a list of those EnVRs will appear. Select a single EnVR to add cameras to, then select Next.

- The interface returns the Device ID (serial number or MAC Address) and the Make/Model of the found cameras. Users can select a number of provisioning parameters at this stage:
- Desired IP. Assign a known static IP address to this camera.
- Required when the camera is on the primary LAN interface and the user does not want it placed on the virtual camera network of the primary LAN.
- If the desired IP is to stay at the same existing IP address for already activated cameras, enter an IP address here.
- Otherwise this field is optional, but the IP address must be accessible from the Lan interface the camera is connected to.
- Profile. Cameras can be handled by the Envysion application in one of two modes:
- Managed. Allow the recording settings and configuration of the camera to be driven by users of the Envysion application.
- Record Only. The settings of the camera, as pre-configured by the customer or technician outside of the Envysion application will be preserved and not driven by users of the Envysion application.
- Current Password. For managed cameras that have already been activated this field is required, but is not required for unactivated/factory cameras with the intent that they will be managed cameras. All unmanaged (Record Only) cameras must provide a password in this step. Must be provided to allow Envysion to connect to the video streams of the camera for both Managed and Record Only profiles
- Replace Camera. Used when the discovered camera is intended to take over for another camera that has failed.

Alternatively, if the expected camera is not recognized by the Envysion software but is known to exist on the network, it may be manually added to the application by its IP address and login credentials. Cameras added manually will be added as “Record Only” devices.
8.After the list of discovered cameras loads, check the box for any camera(s) you would like to add, then select Next.
Note: The Add Camera workflow will automatically assign IP addresses and passwords to cameras it discovers. Please have all your cameras connected to the network when you begin this operation, including cameras that have already run through the camera provisioning process, and use the Desired IP address field to ensure pre-assigned IP addresses aren’t overwritten by the next operation.
- Wait for cameras to be added to the system. The loading screen will provide an estimate of when the process should complete.
- At the end of the provisioning process, the user will be presented with an option to name each camera, map the camera views to Point of Sale registers defined for the domain, and dictate the Display Order (an integer value that dictates the sequence in which camera views will appear in Watch Video, irrespective of their IP address or channel number).
- If an issue is found, an error message will be displayed to allow any missing information to be entered to allow the provisioning process to complete, If you have any questions Please reach out to us at 877-258-9441.

What to do if your camera is not found? Click the link Below
