LTE-M Panic Buttons:
Panic Buttons Customer Test Procedure
Important Information: The “Test Panic Buttons” feature is intended for regularly testing the functionality of your panic buttons, ensuring they’re ready when needed. To ensure proper operation, do not use this feature to replace the batteries. Battery replacement should be performed according to the instructions outlined here: Panic Buttons Battery Replacement Procedure
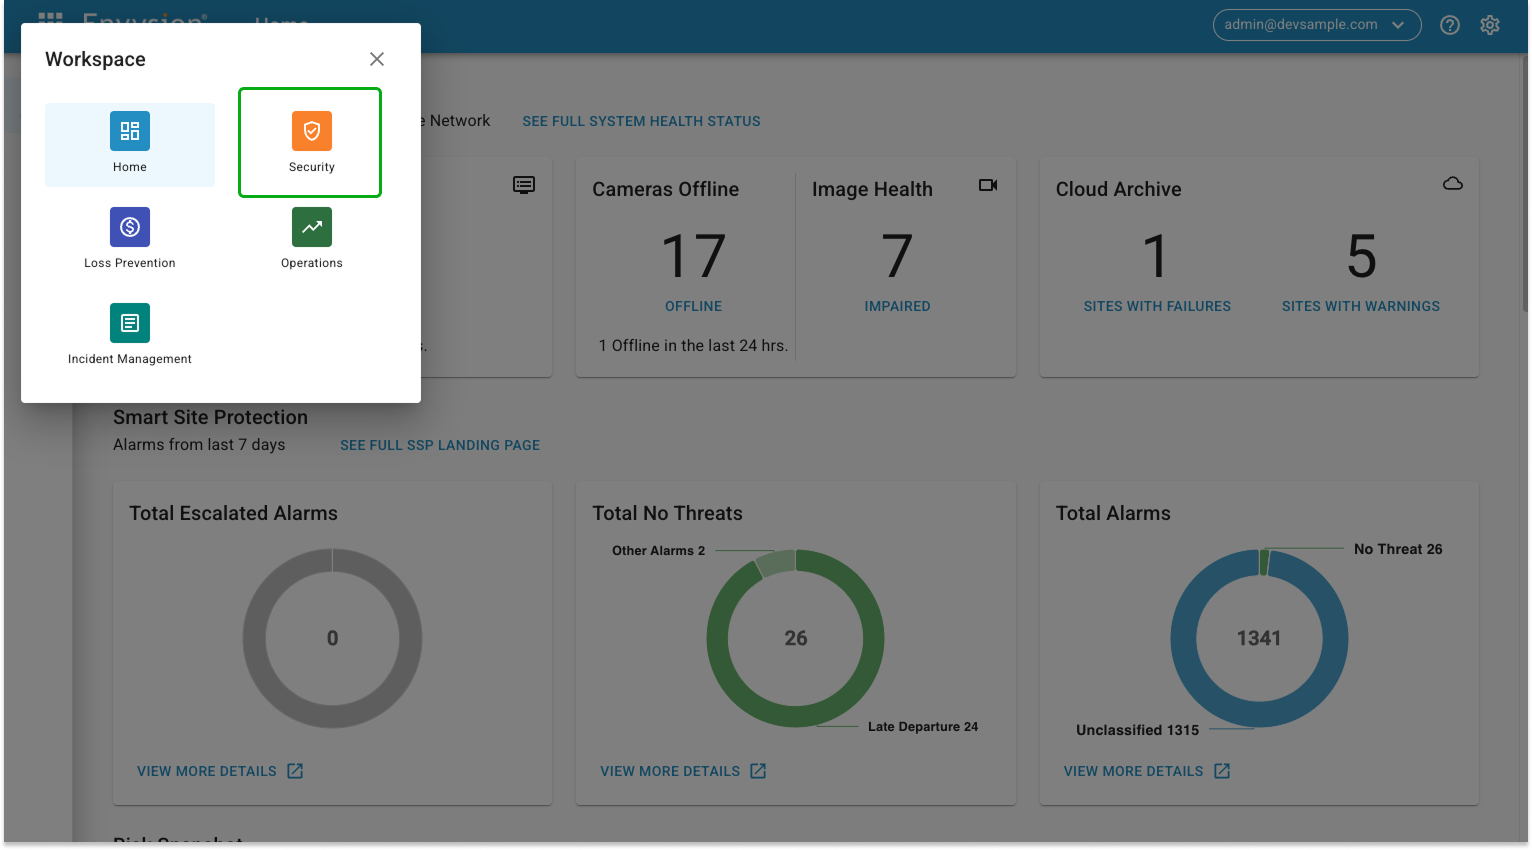
Log in to the Envysion application and select the “Security” item in the Workspace menu:
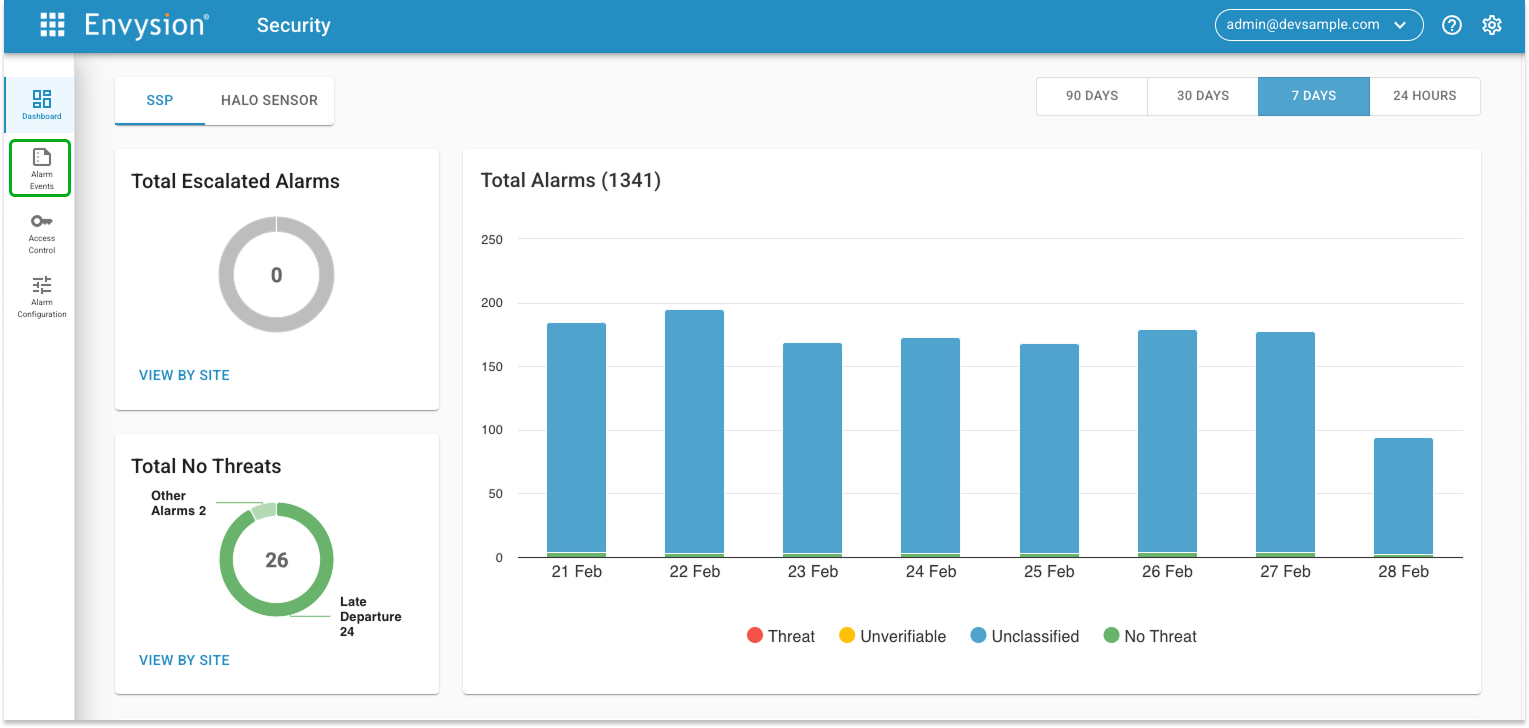
You will land on the “Security Dashboard” page. From here, click the “Alarm Events” icon on the left side menu:
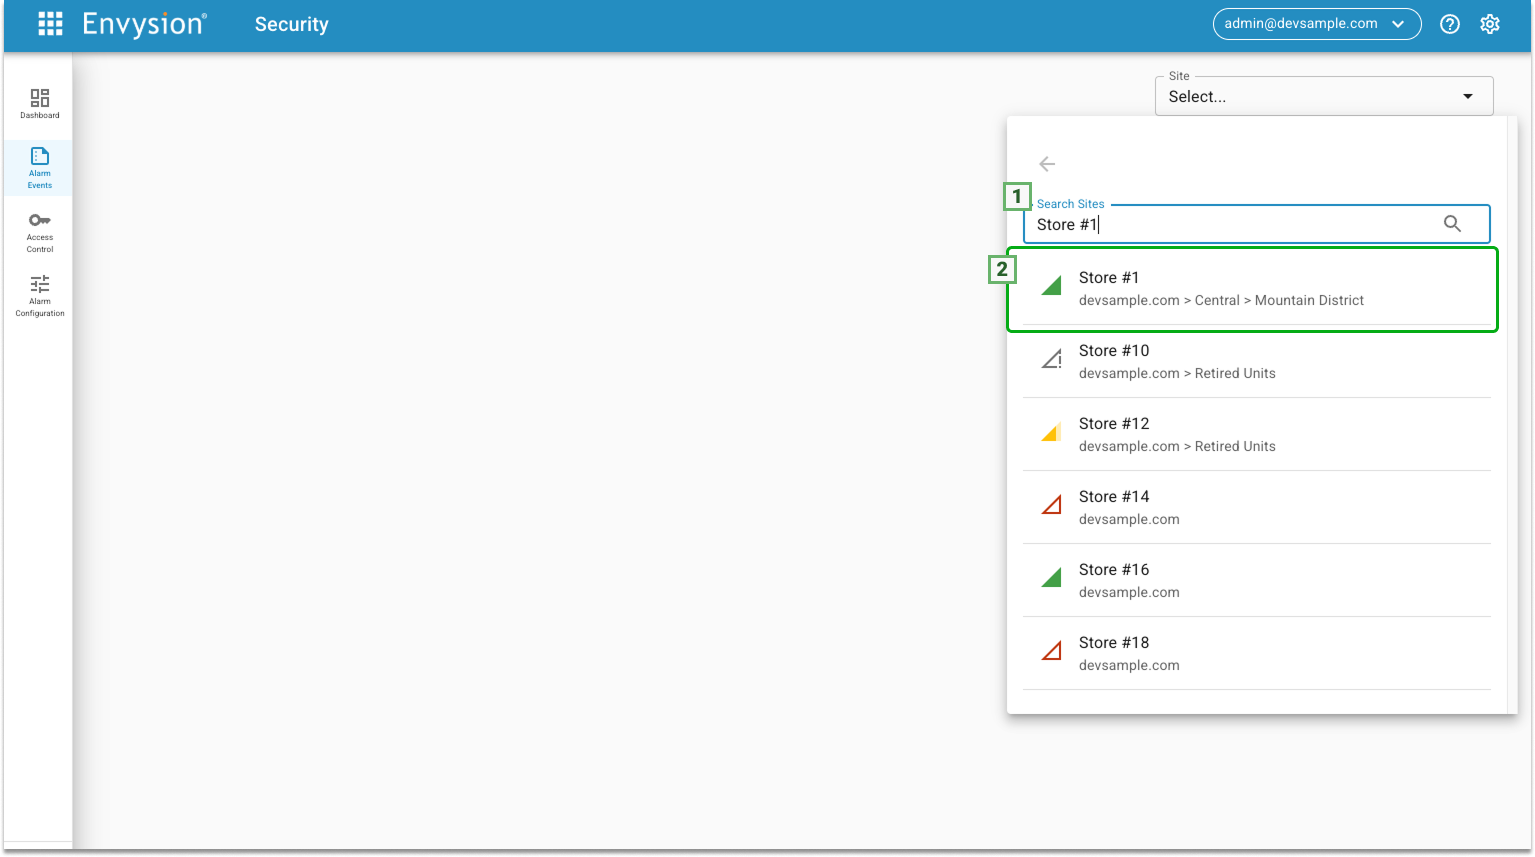
Next, you will land on the “Alarm Events” page, and the site selector will be open. Search for your site using the search box on the top of the site selector component (1), and then click on the site in the list below (2):
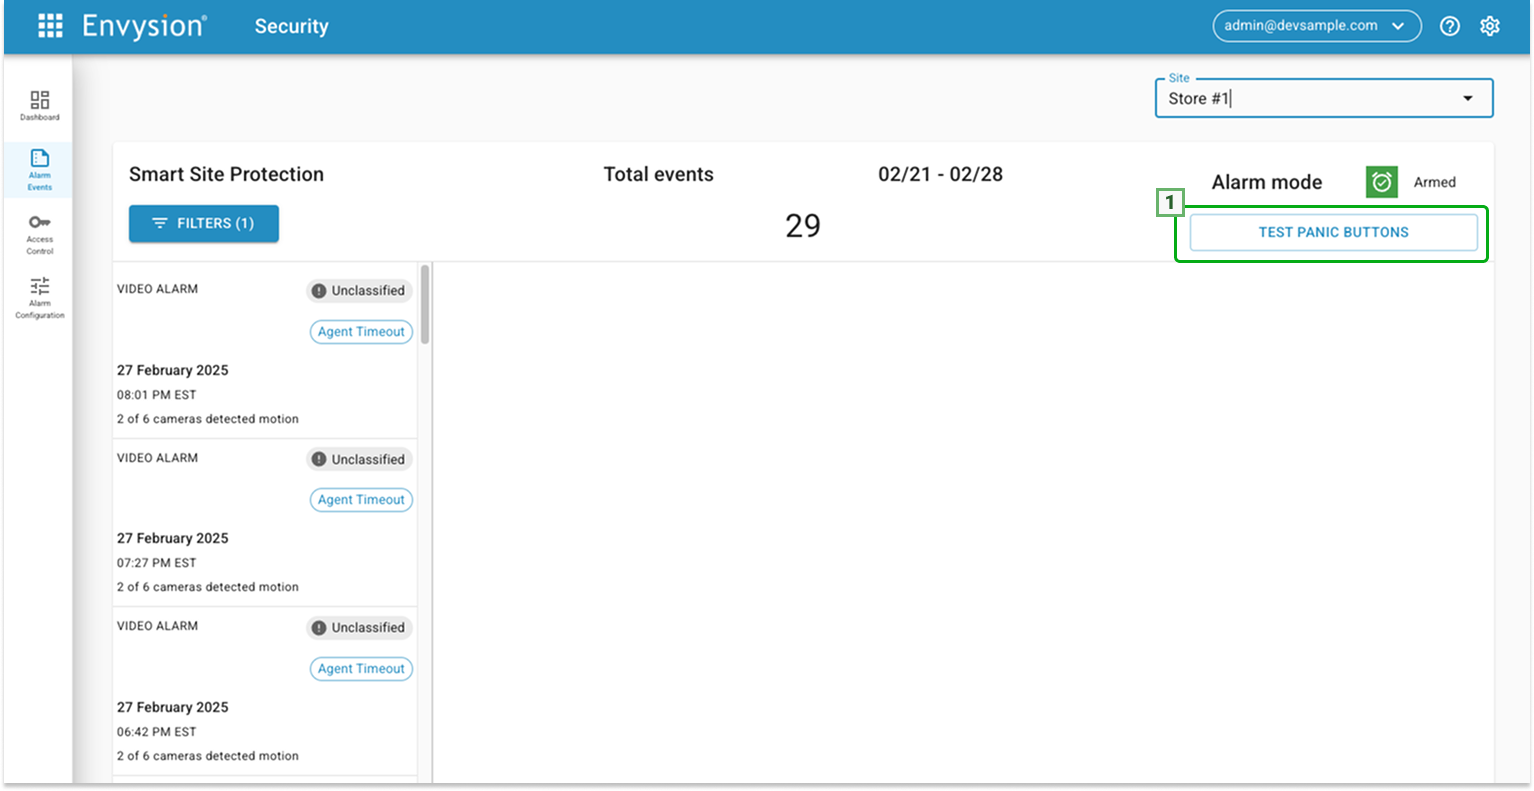
You are now on the store’s “Alarm Events” page, where you will see a button labeled “Test Panic Buttons” (1) on the top-right side of your screen. Click on that button in order to start the Panic Buttons testing session.
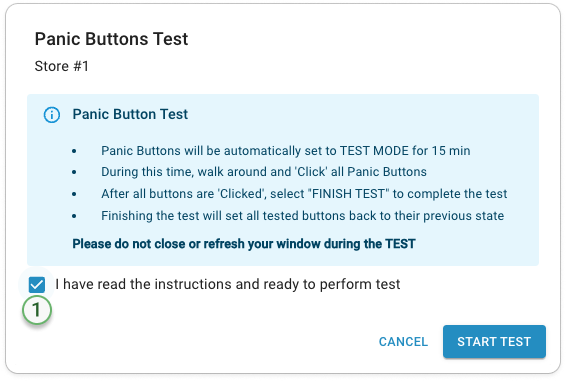
Once you click the “Test Panic Buttons” button, you will see a pop-up with instructions on how to perform the testing. Once you read the instruction you will have to tick the acknowledgement checkbox (1) in order to activate the “Start Test” button and start the actual testing. The test session will last fifteen minutes from the moment you click the “Start Test” button. Please note that during this time, all your Panic Buttons will be automatically switched to “Test Mode” and therefore not functional. The buttons will switch back to “Active mode” automatically after fifteen minutes or once the test session is completed, whichever happens first.
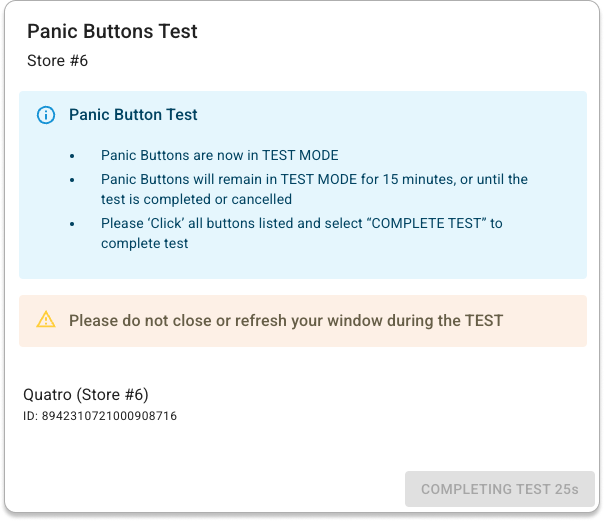
After you click the “Start Test” button a new pop-up will be displayed with instructions on how to perform the testing. You have fifteen minutes to go and short press once each button in your store. Once this action is completed, return to the computer and click on the “Complete Test” button. The test session will take 30 seconds to close and you will see a countdown timer on the button.
IMPORTANT! Please do not close or refresh the window during this time.
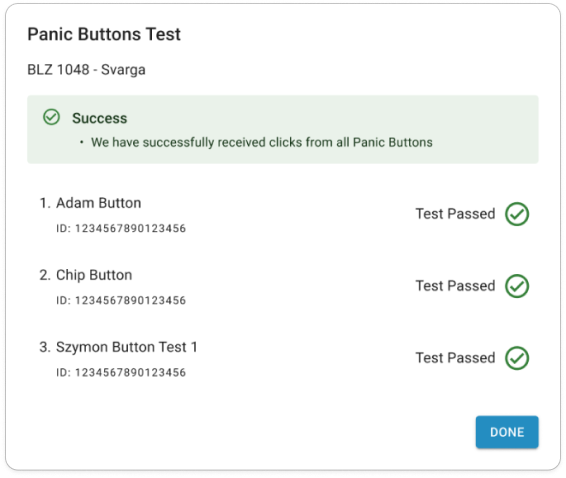
Next you will see the confirmation screen. If the testing was successful, you will see a green confirmation message that will inform you that all your buttons are functioning correctly. You will also see a “Test Passed” message and a green check-mark next to each button. All you have to do now is click the “Done” button, the pop-up will close, and the buttons will switch back to “Active” mode.
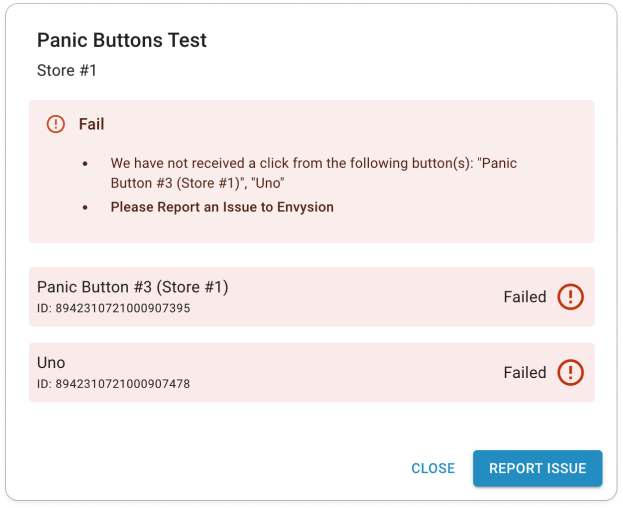
If any of your buttons for any reason fails to send the signal and is not passing the test, on the last screen, instead of a green successful message you will see a red “Error” message, that will prompt you to report the issue. In this case you can try testing your buttons one more time, just to make sure that the error was not caused by a network glitch, or you can directly report the issue to Envysion, by clicking on the “Report Issue” button below, and our technicians will fix the issue in the shortest time possible.