Device Management:
Configuring Public View Monitors (PVM)
Public view monitors (PVM) connected an EnVR need to be configured in the Envysion app to complete monitor configuration. By default, the first 16 cameras are displayed on each connected monitor in a 4×4 grid layout. Up to 2 monitors may be connected per EnVR for older models, but for the newest ones you can use all 3 outputs.
Prior to following these steps, connect all your PVMs to the EnVR, so that they can be discovered and configured in one session.
Configuring Monitors in the Web App
Setting up PVM in the app – Video Walkthrough
From the Watch Video interface, select the target and follow the steps below to configure monitors.
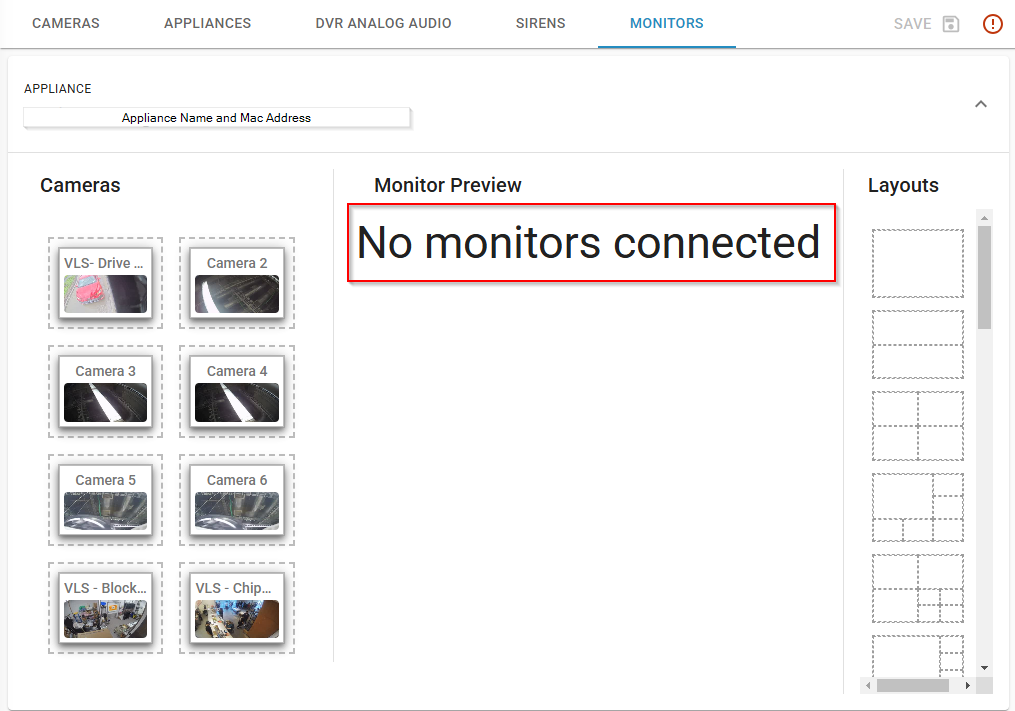
- Navigate to “Site settings” on the right side of the site page.. Then at the top of the screen go to the Monitors tab.

- If there is an issue with the EnVR seeing the monitor connection you will see this screen.
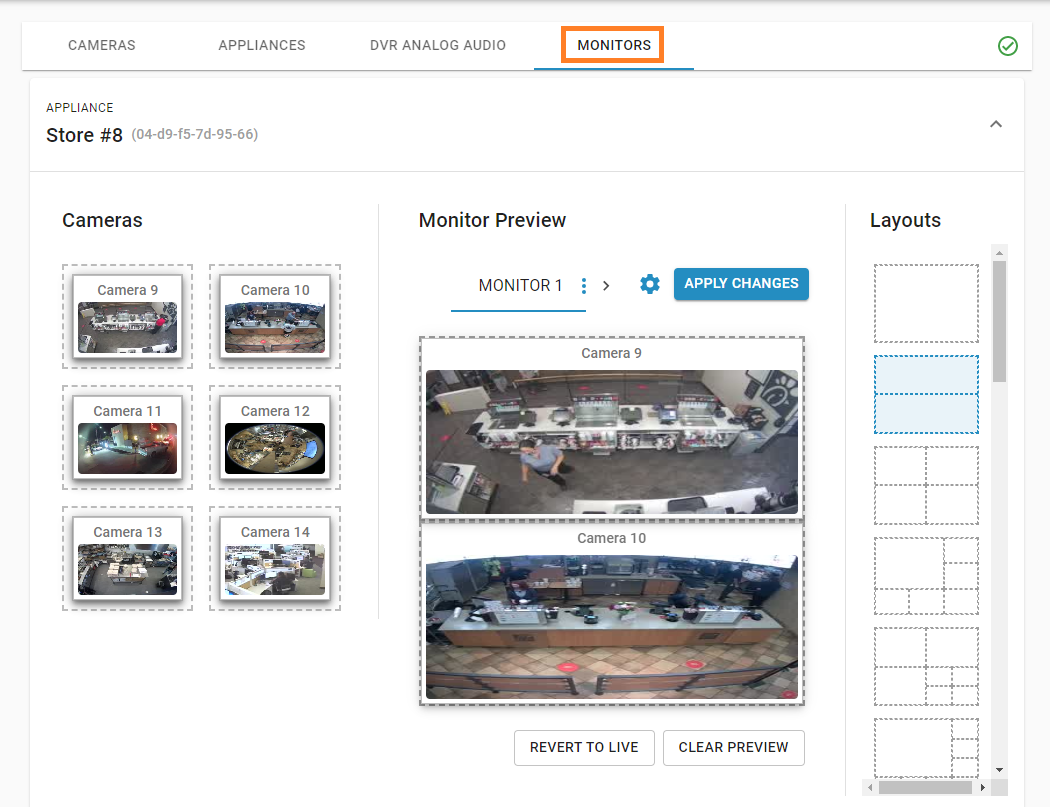
- On the Monitors tab, select your monitor layout from the Layouts list on the right.
- Drag cameras from the Cameras list to the Monitor Preview to display cameras for the monitor.
- To update the PVM configuration, click Apply Changes.
- To discard changes to PVM configuration and return to the live monitor configuration, click Revert to Live.
- To start with a blank PVM configuration, click Clear Preview. Note: Clearing the preview does not update the PVM settings until changes are applied.
Other Monitor Configuration Options
Additional options to configure PVMs are available under the gear menu:
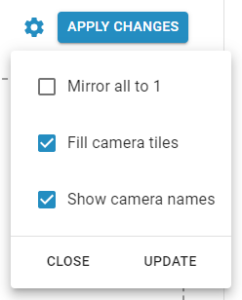
- Mirror all to 1: mirror all other monitors to Monitor 1 so that all monitors connected to the appliance will have the same display.
- Fill camera tiles: minimize black space by maximizing the camera display regardless of aspect ratios.
- Show camera names: adds an overlay on the PVM of the camera name
Was this post helpful?
Let us know if you liked the post. That’s the only way we can improve.